How to add the tracking system into Assimilate Live FX Studio
ASSIMILATE products support the connection and configuration of Antilatency tracking for real and virtual cameras. You can add the Antilatency tracking directly to the Live FX Studio app, or add it as a FreeD tracker to Live FX using AntilatencyFreeDServer (coming soon). In both versions of Live FX, only one tracker may be used at a time.
In this article
Preparing
- Antilatency tracking area
First, set up your tracking area. Keep in mind that it is the tracked camera that should be located within the tracking area, not the subjects of the shooting. - Attaching the socket to the camera
Place the socket with an Alt on the camera body so that the tracker is pointed toward the IR markers. You should choose a place on the bottom of the camera for a floor tracking area, or on top of the camera for a ceiling-based tracking area. Attach the socket to the camera (for example, with duct tape) and insert an Alt into it.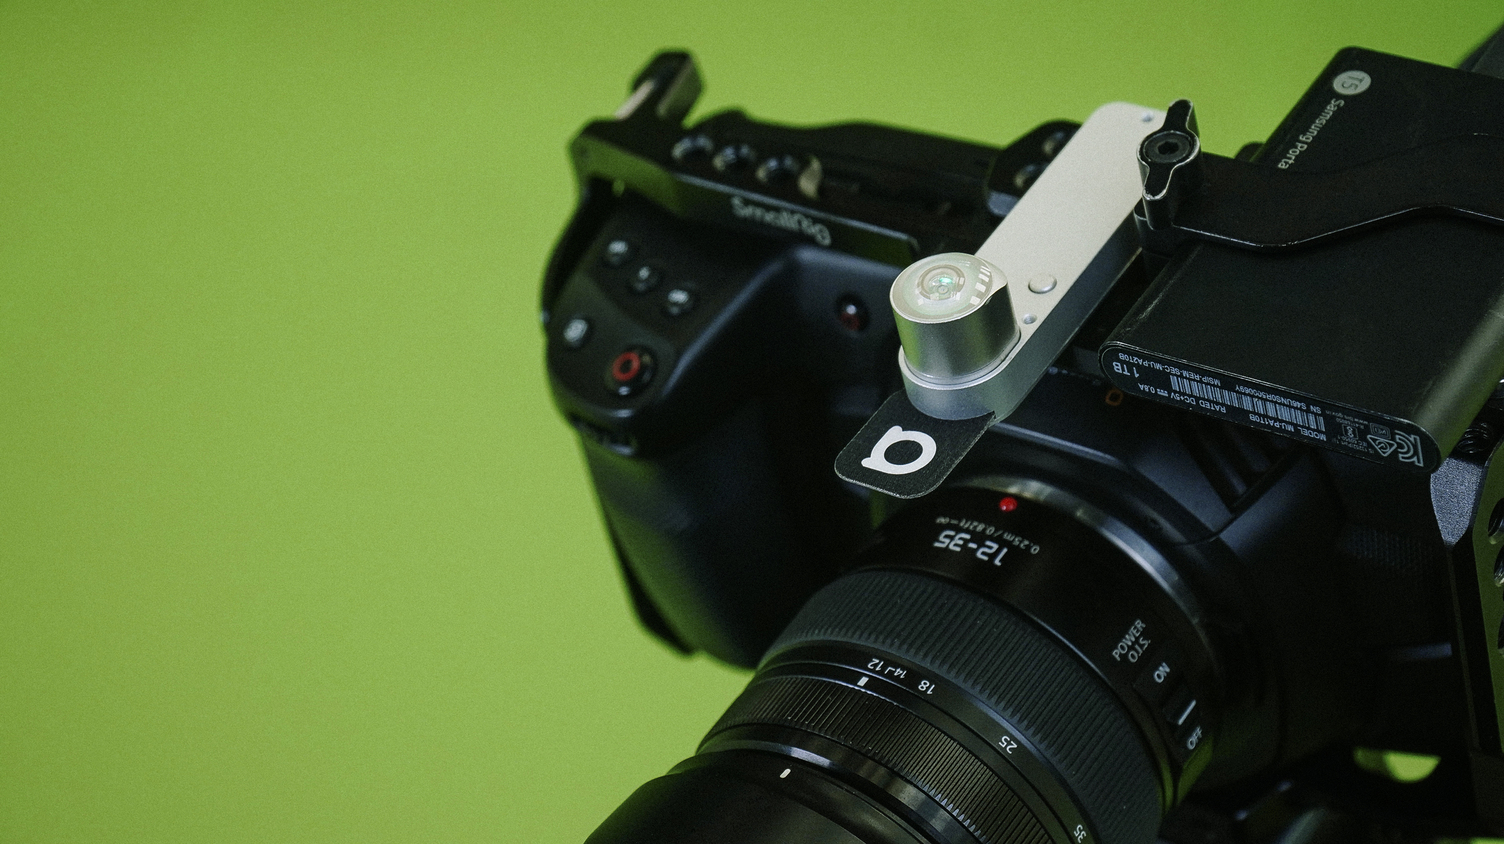
- Configuring the Antilatency socket and its position
Now you may configure the connection and the Placement of the socket on the camera.According to the SDK version used, you will need the AntilatencyService version 3.5.3.- Depending on your socket, make a wired or wireless connection to the computer the Live FX app is running on. Follow this guide to configure wireless sockets (2 items).
- Use the Device Network tab of AntilatencyService to check all sockets' and Alt-tracker's connection.If the Antilatency devices are not displayed in the Device Network tab, do either without leaving this tab:
- close other applications that use tracking, such as Steam VR;
- physically disconnect all sockets that are directly connected to the computer (Wired USB Socket, Universal Radio Socket), and then reconnect them.
In addition, in the Device Network tab, you can check the serial number of the socket in which the Alt is placed. The value of the sys/HardwareSerialNumber property will be used as the tracker name in the Live FX Studio program.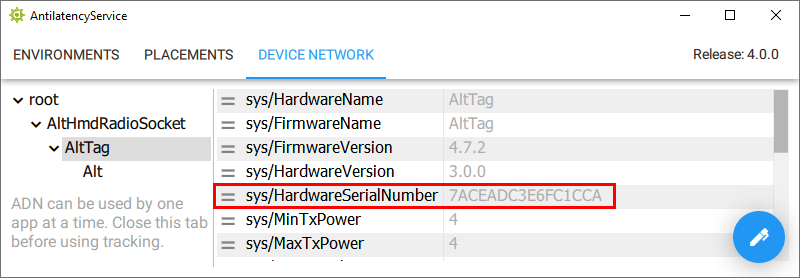
- Finally, go to the Placements tab of AntilatencyService and create the Placement of the socket on the camera.
Live FX quick start
If you already know how to use the Live FX program, skip to the next section.
Download Live FX here.
To quickly create a new project, watch the "Setup" chapters in the first and second videos, or use the text instructions:
- Create a new project for your test (New button) and define its minimal settings such as Project Paths and Default Image Format Settings.
- Before you start working, open the Video IO Settings and select a video source from the drop-down menu, for example, NDI. Turn this source on by clicking the On/Off button and activate one Input and one Output channel. Finally, use the Apply Settings button and close the window.
- Enter the project, and create a new live composition (Live Setup button) in the Construct tab.
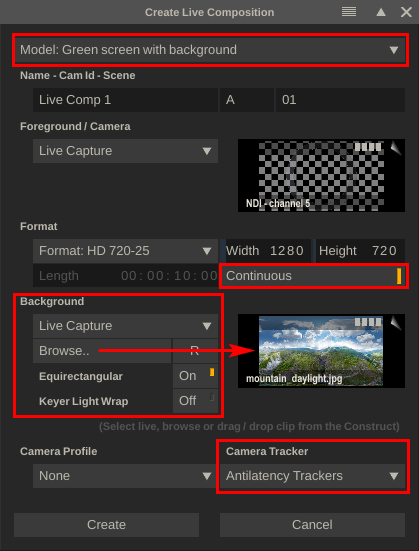
- Set the highlighted settings of the composition to the ones screenshotted below. You can download this image from an open source to use as a background. Depending on the version of the Live FX app, you can enable Antilatency tracking directly or as a FreeD tracker.
- (Optional) To conveniently display the background when an image source is empty: select the Keyer layer in the Layers section and drag it above the Background layer.
Adding Antilatency tracking directly
Suited for Live FX Studio only.
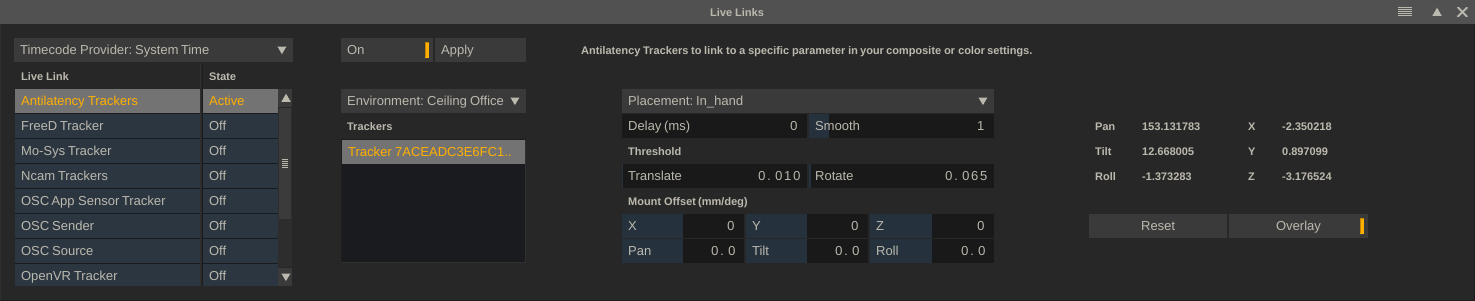
Open your project in Live FX Studio, select the Live FX settings menu in the Live FX tab, and open the Live Links manager window.

Select Antilatency Trackers in the Live Links manager and activate it with the On/Off button. Now you can configure the first three parameters:
- The Environment drop-down list – select the name of the required tracking area or default to use the default area in the AntilatencyService app.
- The Trackers list – if you use one tracker, it will be selected automatically in the list. Physically, the Alt will be flashing green, as its tracking mode is activated immediately. If there is more than one tracker, select the one which name matches the serial number of the socket on the camera. This value can be viewed in the Device Network tab of the AntilatencyService application.
- The Placement drop-down list – select the name of the created placement from the AntilatencyService or select default, similar to the Environment parameter. Moreover, you can configure the placement of the tracker directly in Live FX (Mount Offset settings' block + select the Identity option in Placement). However, we strongly recommend that you change these settings in AntilatencyService.
Now you can move on to configuring the rest of the tracking parameters – at the end of this tutorial.
Adding Antilatency tracking as a FreeD tracker
Suited for the Live FX program where Antilatency tracking is not supported directly.
Download and run AntilatencyFreeDServer using this guide.
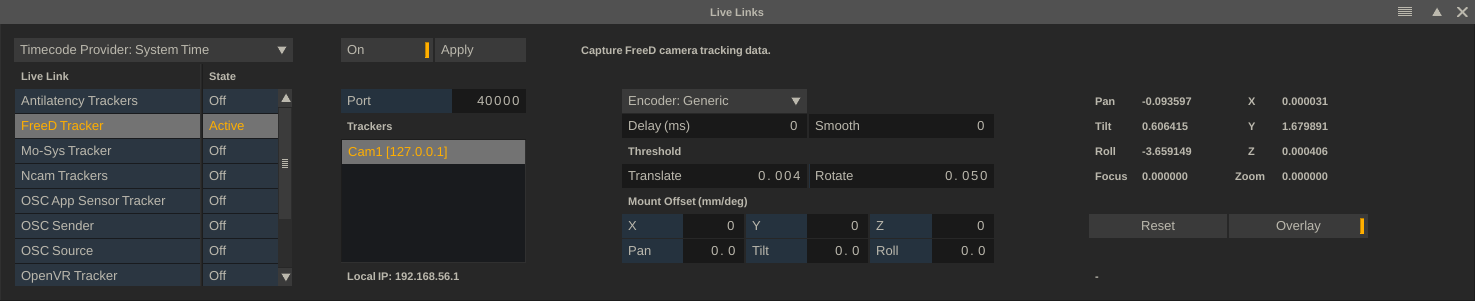
Open your project in Live FX Studio (if it is not open already), select the Live FX settings menu in the Live FX tab, and open the Live Links manager window.
Select FreeD Tracker in the Live Links manager and activate it with the On/Off button. Now you can configure the first three parameters:
- Port – specify the same port number as in the
settings.jsonfile that you configured to use AntilatencyFreeDServer. - The Trackers list – if you use one tracker, it will be automatically selected in the list. Otherwise, select the number of the camera you need.
- The Encoder drop-down list – select the Generic option.
Additional tracking settings in Live Links
After selecting the tracking type in the Live Links manager, configure the rest of the parameters Assimilate says:
- Delay
The camera tracker data and image data usually travel different paths. The tracker data is usually sent over an Ip network, while the camera live image comes in through SDI. This also means that the data travels at different speeds. If you combine the data again in a live composition you need to compensate for this. Since the tracker data is in general faster than the image data, there is a delay setting with each tracker. This delay is specified in milliseconds and represents the timeframe between the arrival of the tracker data and the arrival-/-capture of the corresponding camera image through a VideoIO channel. - Smooth
The Smooth option applies a filter to the tracker data to get rid of any jitter. Note that the stronger the filter, movement changes might come over as somewhat delayed. This is inherent to filtering real-time data. - Threshold
This is another way of filtering out potential noise in the tracker data: changes in the tracker data smaller than the threshold are ignored. Note that setting the threshold too high can make an actual camera move appear as a little jump.
We recommend that you read the entire Live Links section of the Assimilate User Guide.
Read more about the Timecode Provider in the Assimilate User Guide.
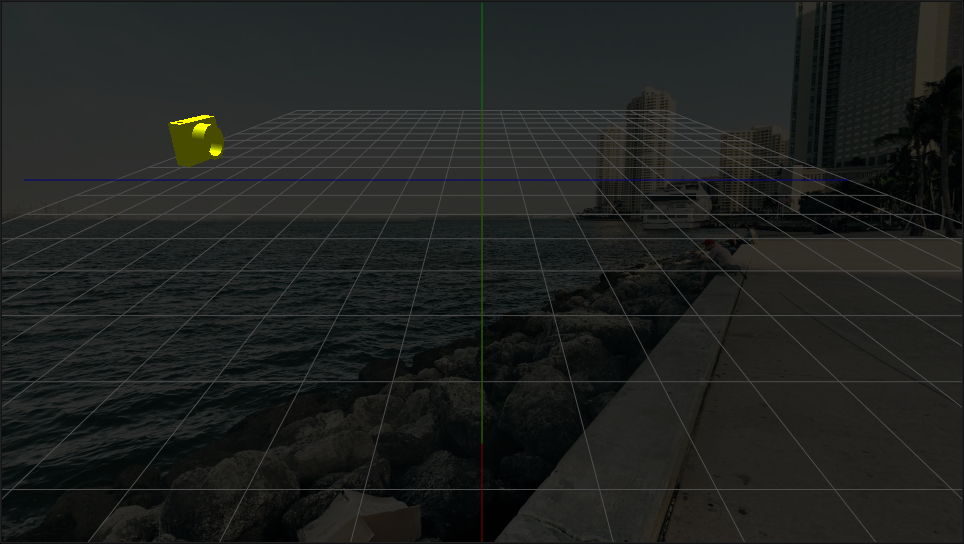
To see the tracker (camera) display and check the trajectory of its movement, enable the Overlay option.
After setting all tracking parameters, click the Apply button. Now you can close the Live Links manager window.
Useful links
- Antilatency: Quick start;
- Connecting a virtual scene from Unity: the guide, the video tutorial and plugin links for KlakSpout and OSC Jack;
- Connecting a virtual scene from Unreal Engine:
- the Live FX plugin for UE – in Unreal Plug-in section;