How to add the tracking system into Unreal Engine via Glassbox Tech’s DragonFly plugin
The Glassbox Tech's DragonFly plugin supports binding Antilatency tracking to a virtual camera in Unreal Engine. This manual describes how to connect and configure the tracking system. With DragonFly, only one camera may be tracked at a time.
Contents
Preparing
- Antilatency tracking area
First, set up your tracking area. Keep in mind that it is the tracked camera that should be located within the tracking area, not the subjects of the shooting. - Attaching the socket to the camera
Place the socket with an Alt on the camera body so that the tracker is pointed toward the IR markers. You should choose a place on the bottom of the camera for a floor tracking area, or on top of the camera for a ceiling-based tracking area. Attach the socket to the camera (for example, with duct tape) and insert an Alt into it.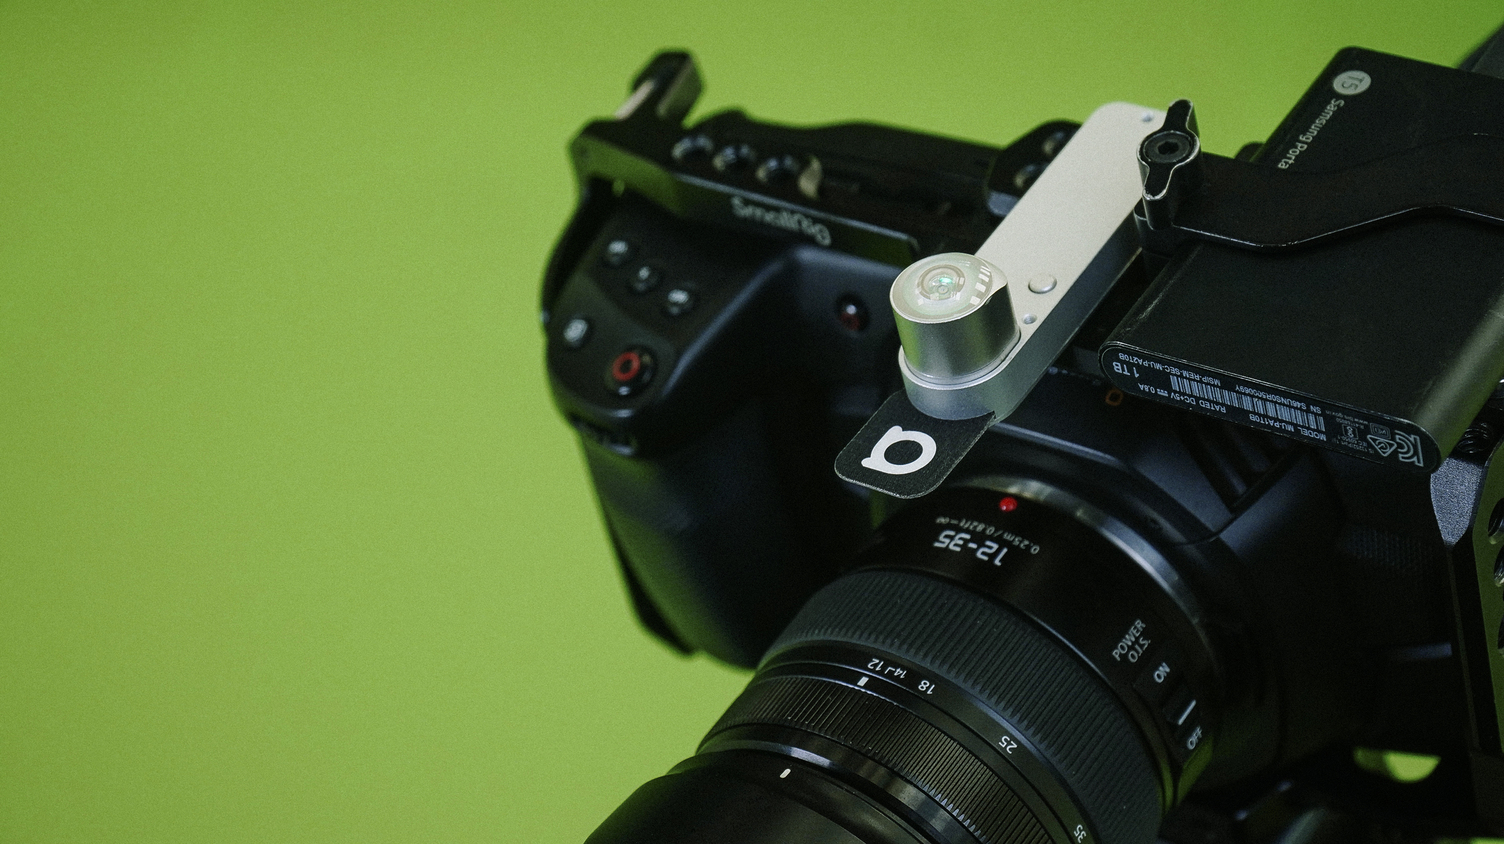
- Configuring the Antilatency socket
Now you may configure the connection, set the Tag property and the Placement of the socket on the camera.
- Make a wired or wireless connection to your hardware depending on your socket. Follow this guide to configure wireless sockets (2 items).
- Use the Device Network tab of AntilatencyService to set the Tag property (ex. MainCamera, Camera1) and check all sockets' and Alt-tracker's connection.
- Finally, go to the Placements tab of AntilatencyService and create the Placement of the socket on the camera.
Installing plugins
Before your project in UE is opened, install the DragonFly plugin according to your Unreal Engine version:
- Download a free 30-day trial of DragonFly or purchase a license via the Glassbox Website;
- Unzip the archive with the plugin into a convenient folder;
- Use the guide "INSTALL DRAGONFLY" from the attached file. In our case, it is DragonFly 3.1 for Unreal Quick Start Guide.pdf.
Open your project in Unreal Engine.
Open the window with plugins:
Edit tab – Plugins.Find and enable the DragonFly, Live Link, and LiveLinkVRPN plugins.
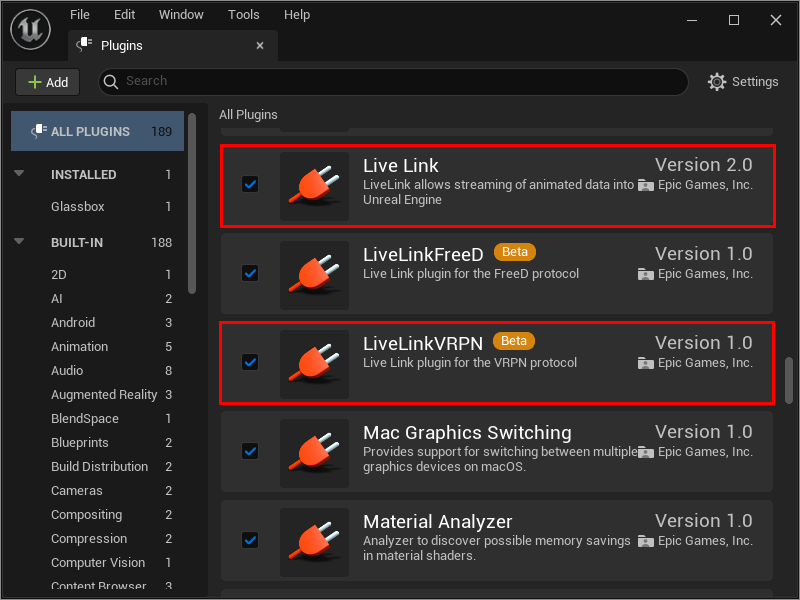
If the DragonFly has not appeared in the
Installed section, enable Live Link and LiveLinkVRPN first and then restart Unreal Editor (with the Restart Now button). If the DragonFly plugin's state is still "not enabled", enable it and restart Unreal Editor again.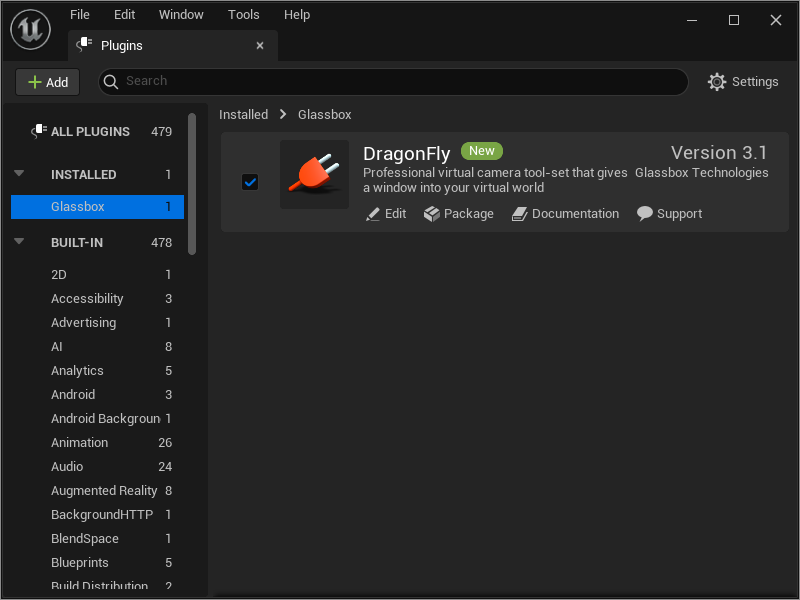
Getting tracking data using VRPN
Configure tracking data broadcasting via VRPN according to this guide.
Start the VRPN server.
Open the LiveLink menu in Unreal Engine:
Window tab – Virtual Production – Live Link.
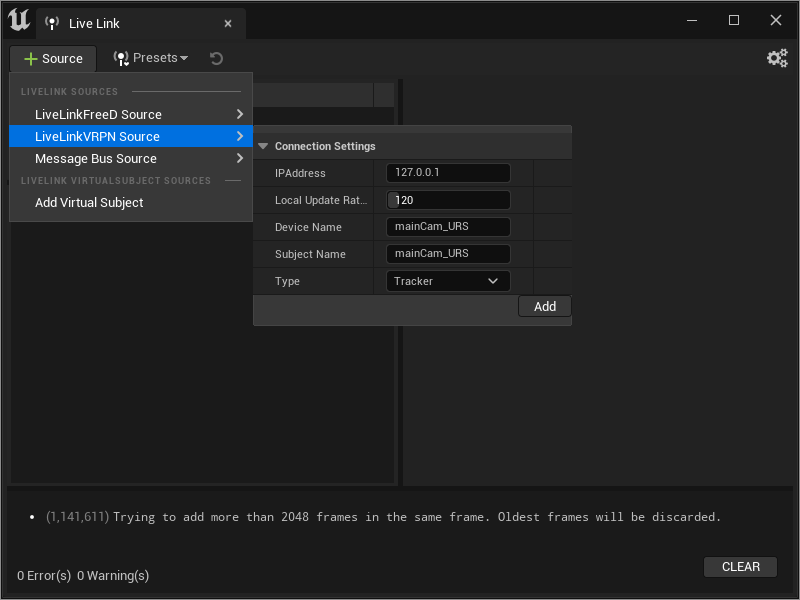
IPAddressis the ip-address of the server that broadcasts the tracking data. The default is127.0.0.1meaning the server is running on the local computer. In addition to the ip-address, you can also specify the server port number through ":" (127.0.0.1:3884).Local Update Rate in Hzcorresponds to the frame rate per second.Device Nameis the tag of the socket.Subject Nameis an arbitrary object name. It will be used to add tracking to DragonFly.Type–tracker.
Perform coordinate transformation:
- Click on your VRPN source in the
Sourcesection, then in the Subject section select the added tracker by its Subject Name. - Add an element with the
+button in thePre Processorsparameter of theLiveLinktab. - Select the
Transform Axis Switchoption in the nestedIndex [0]parameter, and unfold the tab of this parameter. - Then unfold the
LiveLinktab and set the parameters:Front Axis–Z-Axis,Right Axis–X-Axis,Up-Axis–Y-Axis.
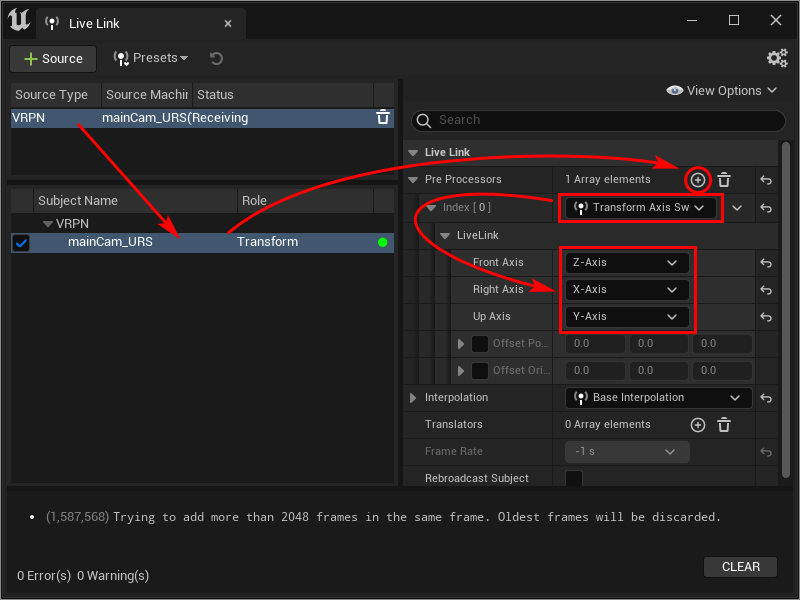
The tracking data provided via VRPN is now correct. You can close the Live Link window.
Adding Antilatency tracking to DragonFly
Click on the
DragonFly panel – Setup on the Unreal toolbar. Next, in the General Tracking section:- select the
LiveLinkoption for theTrackingparameter; - set value:
1to theUnit Conversionparameter.
In the
LiveLink Tracking Settings section choose:Source– theVRPNoption;Subject–<Subject Name from Live Link window>.
Then click
Connect.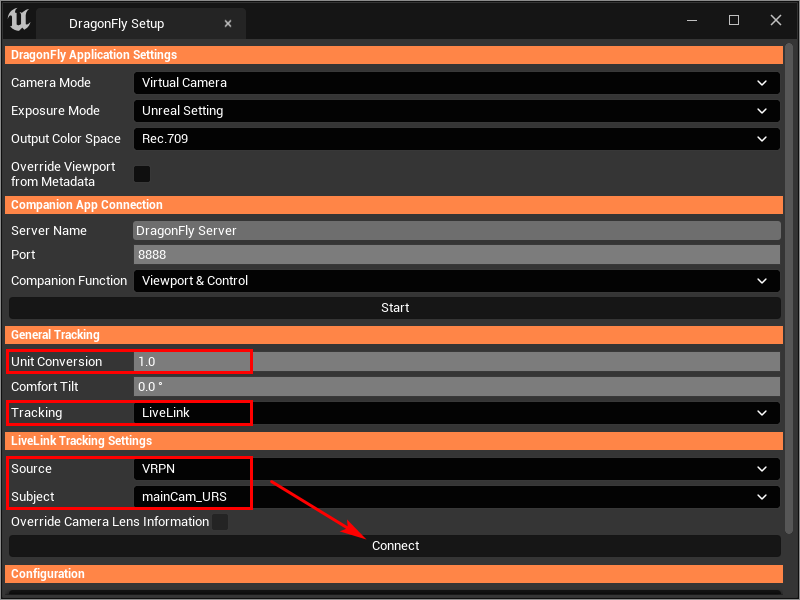
After connecting make sure the
Unit Conversion parameter is set to 1. Otherwise, the camera jitter effect may occur.Other settings that are frequently used during recording should be made in the
DragonFly – Operator Main menu. For more information, see the instructions that came with the downloaded plugin (in our example, it is the DragonFly 3.1 for Unreal User Manual.pdf file).Enabling DragonFly camera view
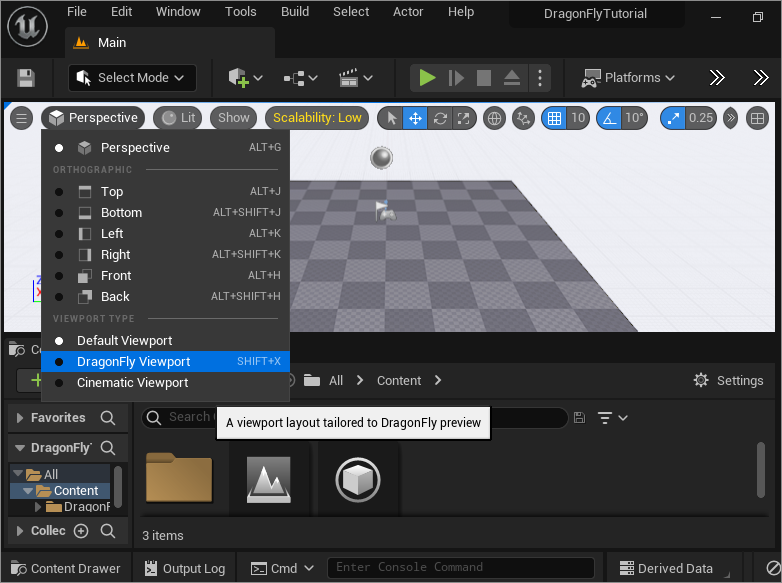
To switch the Viewport in DragonFly View mode, click on
Perspective - DragonFly Viewport in the upper left corner of the Viewport section. If this tool is not available, click on the icon in the upper left corner of the Viewport section, and select Show Toolbar – Perspective.