如何通过Glassbox Tech的DragonFly插件将跟踪系统添加到Unreal Engine

Glassbox Tech的 DragonFly 插件支持将 Antilatency 跟踪连接到 Unreal Engine 中的虚拟相机。本手册介绍了如何连接和配置跟踪系统。 DragonFly 一次只能跟踪一台相机。
内容
准备工作
- Antilatency跟踪区
首先,设置您的跟踪区。设置时,请记住,应该位于跟踪区内的是被跟踪的相机,而不是拍摄对象。 - Antilatency底座配置
现在可以配置连接,将Tag属性和Placement设置为相机上的底座。
- 根据您的底座,与设备进行有线或无线连接。请按照本指南配置无线底座(2项)。
- 最后,转到AntilatencyService的“Placements”选项卡,并在相机上创建底座的Placement。
安装插件
在UE中打开您的项目之前,请安装适用于您的 Unreal Engine 版本的 DragonFly 插件:
- 下载 DragonFly 插件的30天免费试用版或从Glassbox网站购买许可证;
- 将带有插件的档案解压缩到一个方便的文件夹中;
- 按照附件中的“INSTALL DRAGONFLY”说明安装DragonFly,例如 DragonFly 3.1 for Unreal Quick Start Guide.pdf。
如果您项目尚未打开,请在Unreal Engine中打开该项目。
打开插件窗口:
Edit – Plugins选项卡。查找并启用 DragonFly、LiveLink 和 LiveLinkVRPN 插件。
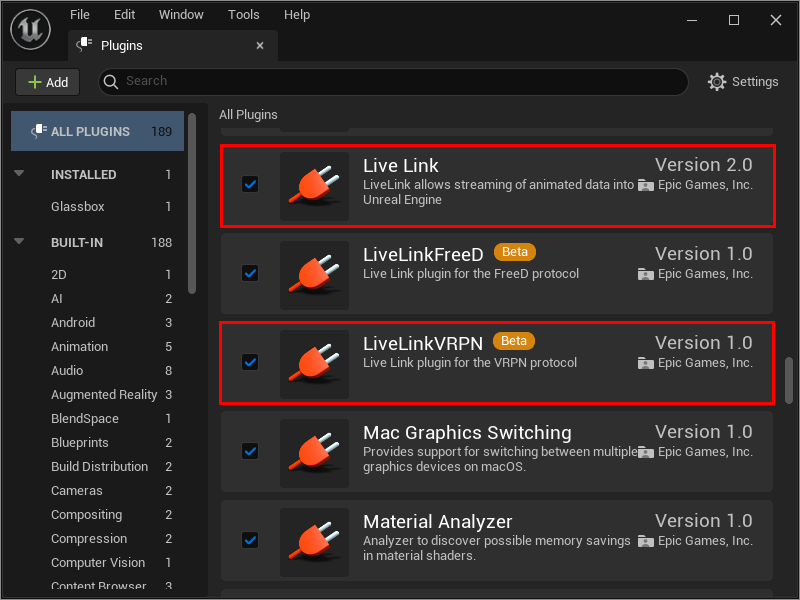
如果DragonFly插件没有出现在
Installed部分,请先启用 Live Link 和 LiveLinkVRPN,然后重新启动 Unreal Editor(Restart Now按钮)。之后,如果 DragonFly 插件没有自动启用,请启用它并重新启动 Unreal Editor。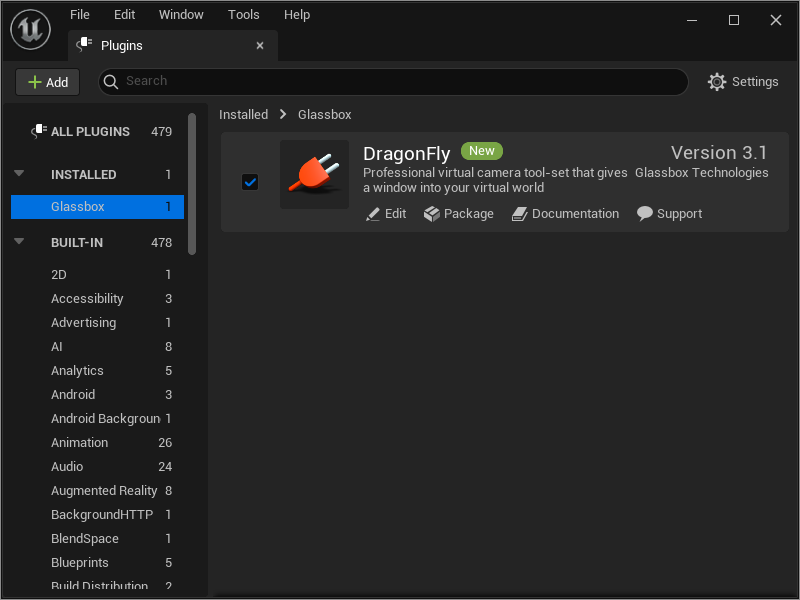
使用VRPN进行广播跟踪
根据本说明,使用VRPN设置接收跟踪数据。
启动VRPN服务器。
在Unreal Engine中,打开LiveLink菜单:
Window – Virtual Production – Live Link选项卡。
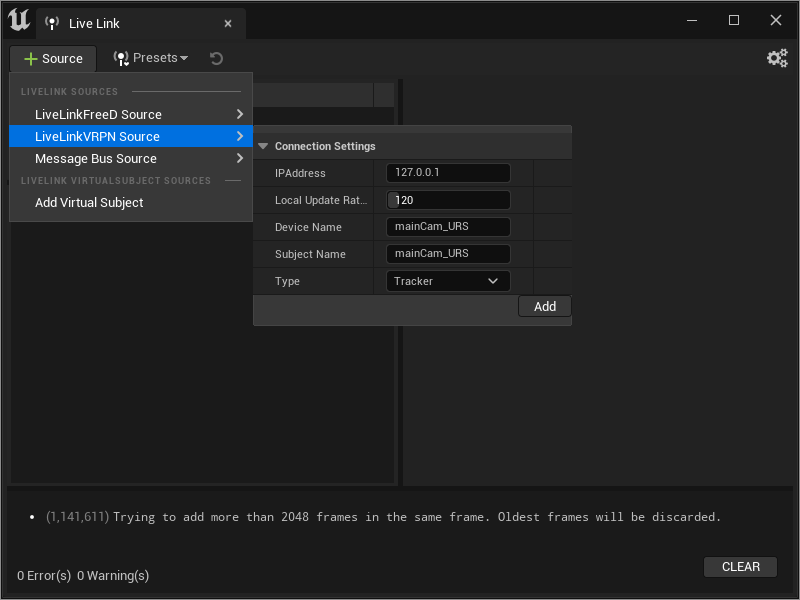
IPAddress:广播跟踪数据的服务器的ip地址。默认值为127.0.0.1:服务器在本地计算机上运行。除了ip地址,您还可以通过“ : ”(127.0.0.1:3884)设置服务器端口号。Local Update Rate in Hz:对应于每秒帧数。Device Name:底座的tag。Subject Name:物体的任意名称。未来,它将被用于为DragonFly添加跟踪功能。Type–tracker。
执行坐标变换。为此:
- 在
Source部分选择您的VRPN源,在Subject部分选择按其 Subject Name 选择添加的跟踪器。 - 在右侧的
LiveLink选项卡中的Pre Processors参数中,使用+按钮添加元素。 - 在嵌套的
Index [0]参数中,选择“Transform Axis Switch”选项并展开此参数的选项卡。 - 接下来,展开
LiveLink选项卡并设置参数:Front Axis–Z-Axis,Right Axis–X-Axis,Up-Axis–Y-Axis。
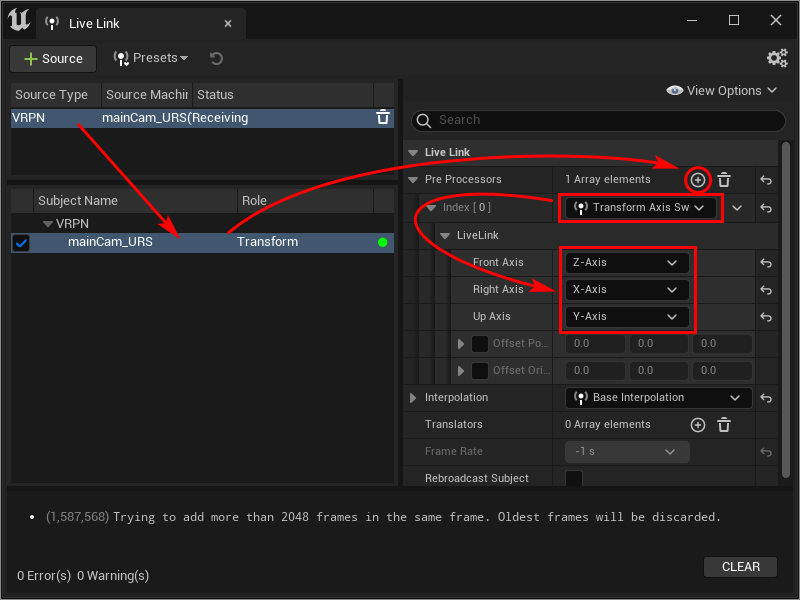
通过VRPN提供的跟踪数据现在是正确的。现在可以关闭Live Link窗口。
将Antilatency跟踪添加到DragonFly
在Unreal工具栏上,单击
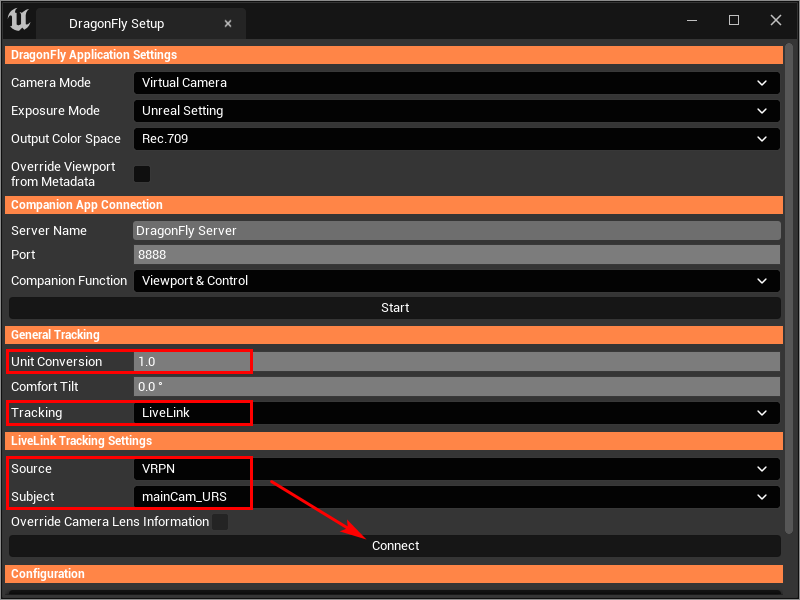
DragonFly – Setup面板。然后,在General Tracking部分:- 对于
Tracking参数,选择LiveLink选项; - 在
Unit Conversion参数,设置值为1。
在
LiveLink Tracking Settings部分:Source——VRPN选项;Subject:<Subject Name>(Live Link窗口);- 最后,单击
Connect。
连接后,请确保
Unit Conversion参数设置为1。否则,可能会发生相机抖动。视频录制过程中经常使用的其余设置应在
DragonFly – Operator Main主菜单中进行。有关更多详细信息,请参阅下载插件的随附说明(在我们的示例中,DragonFly 3.1 for Unreal User Manual.pdf 文件)。启用DragonFly相机的视图
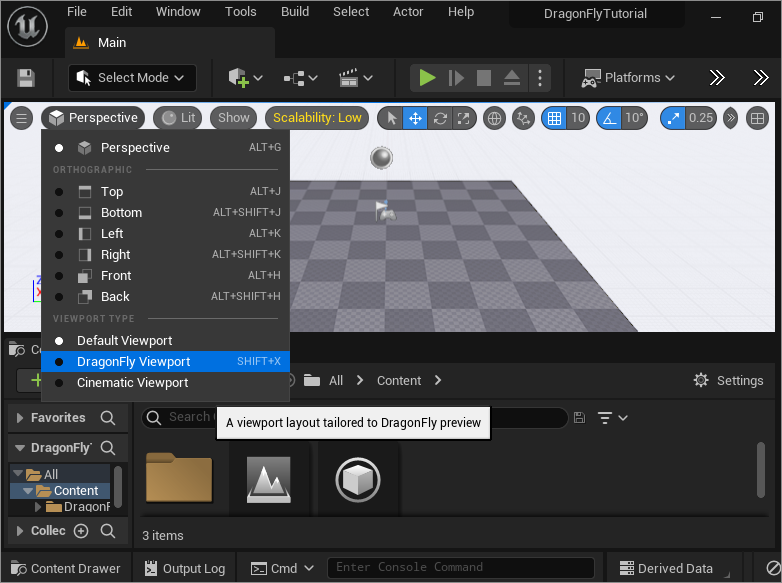
要在DragonFly视图(DragonFly View)上启用视图(Viewport),请在
Viewport部分的左上角单击Perspective - DragonFly Viewport。如果此工具不可用,请单击Viewport部分左上角的图标,然后选择Show Toolbar – Perspective。