OpenVR driver
This driver adds support for the Antilatency tracking system to SteamVR. After installing, you will be able to use the Antilatency tracker and controllers when running SteamVR applications.
Driver structure
<DriverDirectory> /
├─bin /
│	└─ ...
├─resources /
│	└─ ...
└─driver.vrdrivermanifest
Installation
Copy the driver folder into any directory.
Launch this command template via cmd to install the driver:
"<SteamDirectory>\steamapps\common\SteamVR\bin\win64\vrpathreg.exe" adddriver "<DriverDirectory>", where <SteamDirectory> is the path to the Steam folder, and <DriverDirectory> is the path to the driver folder.For example, a command executed from the folder with the vrpathreg.exe file may look like this:
vrpathreg.exe adddriver "D:\AntilatencySoft\OpenVrDriver_3.5.2"Uninstallation
You can uninstall the driver via the command line using the following command:
"<SteamDirectory>\steamapps\common\SteamVR\bin\win64\vrpathreg.exe" removedriver "<DriverDirectory>"In this command:
<SteamDirectory> is the path to the Steam folder, and <DriverDirectory> is the path to the OpenVR driver folder.How to use the driver
This driver adds support for the following device types in SteamVR:
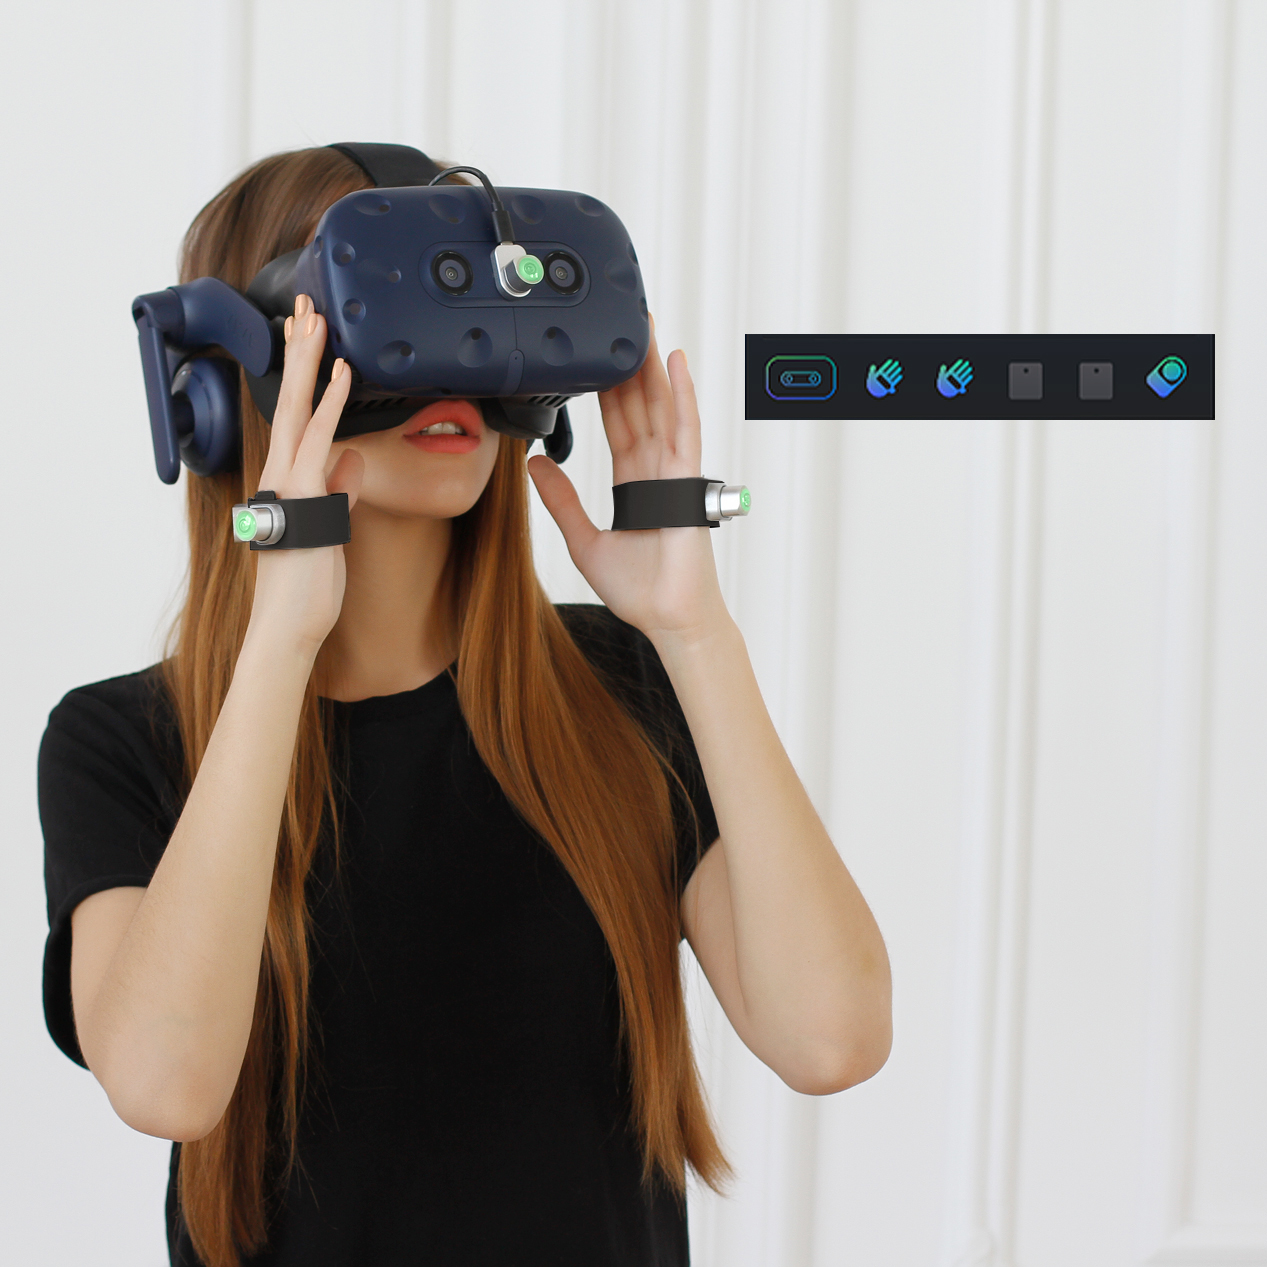
- controller — Bracer.
Look for the tracker’s Placement by the name specified in the
Tag property of the socket. If the property is not set or such a placement is not found, the default placement from AntilatencyService will be used.The Bracer’s placement is set automatically depending on the
Tag property of a socket. Therefore, you should set the Tag property as LeftHand for a left hand, and RightHand — for a right one.Read about how to set the Tag property for a device here: How to configure device custom properties.
Bracer's buttons
Trigger click— push the sensor panel of a Bracer on the inner side of the palm.System click— a trigger click while holding your hand over your head and looking straight ahead.
System click works only after replacing HMD tracking with Antilatency tracking.Standard SteamVR tracking override
To edit the steamvr.vrsettings file you may need to disable «Read-only» access mode in its Properties. After editing the file, we recommend enabling read-only access mode. (Properties - General - Attributes - Read-only)
The standard tracking override is carried out via the
TrackingOverrides section in the <Steam directory>/config/steamvr.vrsettings file.Example:
"steamvr" : {
    "activateMultipleDrivers" : true,
    "forceFadeOnBadTracking" : false
},
"TrackingOverrides" : {
    "/devices/antilatency/Head" : "/user/head",
    "/devices/antilatency/LeftHand" : "/user/hand/left",
    "/devices/antilatency/RightHand" : "/user/hand/right"
},
"driver_antilatency" : {
    "enable" : true
},
"trackers" : {
    "/devices/antilatency/Head" : "TrackerRole_None",
    "/devices/antilatency/LeftHand" : "TrackerRole_None",
    "/devices/antilatency/RightHand" : "TrackerRole_None"
}
SteamVR will overwrite the file if there are
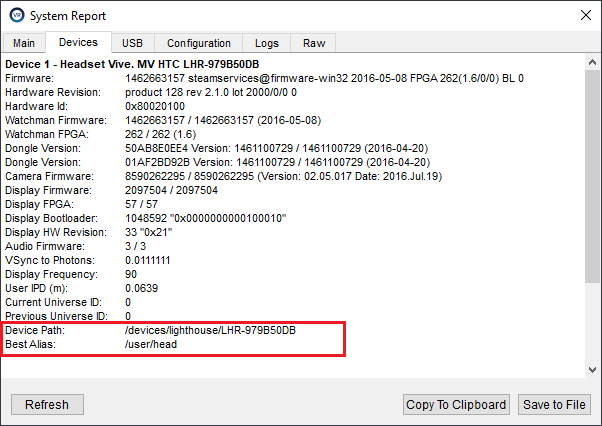
JSON punctuation errors. We recommend you keep a copy just in case. You can check JSON punctuation here.For an HMD that has been assigned a
Head serial number by the antilatency driver, we recommend using the universal serial number /user/head. This will allow you to use an Antilatency tracker with any headset without requesting the System Report. You can also use aliases like we did with hands in the example above.The SteamVR system registers any Antilatency device by the value of its
Tag property if it is set; otherwise, the socket's hardware serial number is used. You can find the serial number of the device, as well as set the value of its Tag property in the Device Network tab in AntilatencyService.Take into account that you should set the values for the following parameters:
activateMultipleDrivers(steamvrsection):true;forceFadeOnBadTracking(steamvrsection):false;enable(driver_antilatencysection):true.
We recommend setting the value in the
trackers section to TrackerRole_None for each device, which overrides tracking.To learn more about SteamVR tracking override, please read the SteamVR documentation.
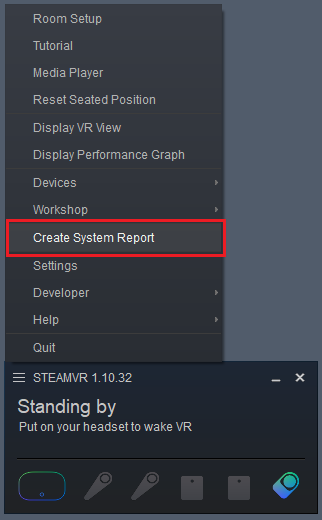
How to find a serial number of an HMD
The serial numbers of all the devices in the SteamVR system are available in the
System Report. To do this, run the Create system report command in the SteamVR menu: