How to set up a pillar tracking area
This section describes the installation process for a Pillar tracking area.
Table of contents
Like the horizontal versions of tracking areas, the vertical ones consist of IR markers combined into reference bars. The pillar tracking area is one of the implementations of the Vertical Environment. IR markers are installed there in metal columns called the Pillar Reference Bars. Pillars are installed on the floor of the room or other horizontal surfaces. Their coordinates are indicated on the Environment layout, after which the configuration is performed.
To set up a pillar tracking area, you will need:
- pillar reference bars (the number is calculated according to a number of parameters – more details later in the article);
- chargers or power banks with a USB type-C connector and an output voltage of 5 V 2 A;
- a room with a flat floor (or other horizontal surface for setting up pillars);
- an Allen wrench (supplied);
- tape measure (regular or laser), a level (if you have one);
- a pre-selected or arbitrary pattern for pillar arrangement to create a Vertical Environment in the AntilatencyService app;
Please note that assembly, installation, and calibration of the tracking area are performed by the customer.
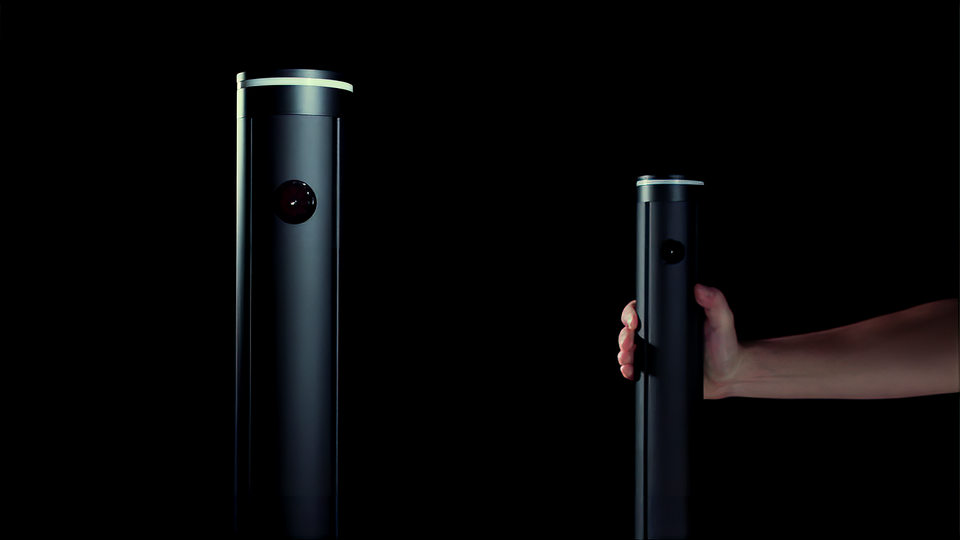
When transporting and moving pillar reference bars, special clamps must be used to protect the suspension with IR markers from deformation. Remove the clamps only after completing the assembly of the reference bars and placing them within the tracking area. To carry a pillar, place your hand on the back side of the pillar (opposite the markers).
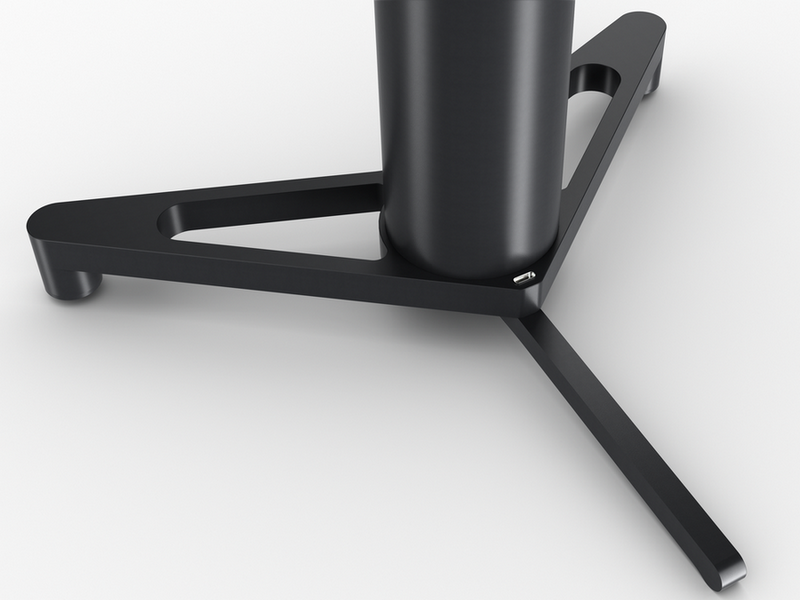
Assembly of pillars
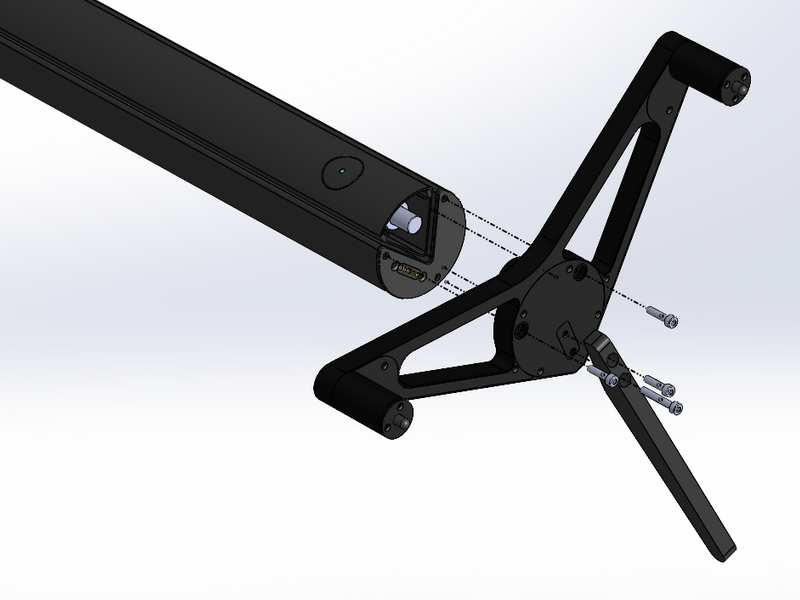
The pillars are shipped partially disassembled. The user needs to fasten the pillar housing to the base with the 4 screws and an Allen wrench included in the kit.
Installation of pillar reference bars in a room
Pillars are installed in the room in an arbitrary way or according to a pre-selected arrangement pattern. They should limit the perimeter of the tracking area and the obstacles within it. Pillars can be placed at different heights (but not one above the other).
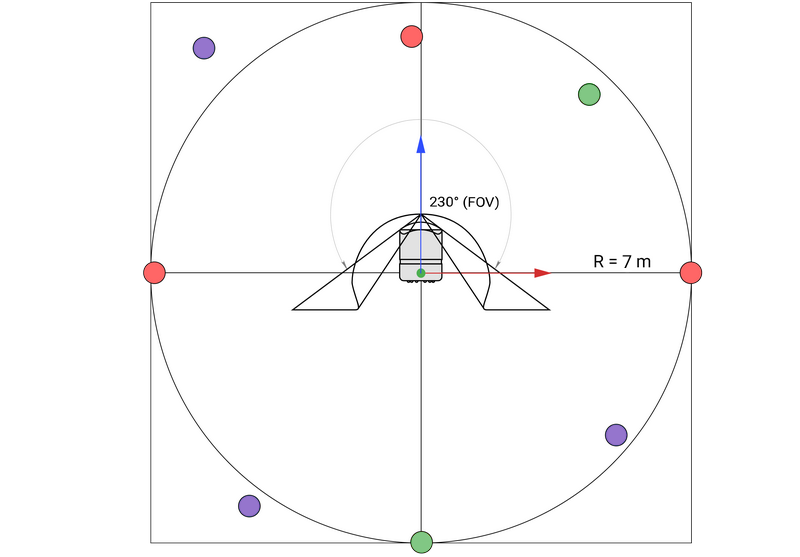
When setting the tracking area, take into account the following recommendations:
- pillars should be placed evenly, but asymmetrically (for formation of features);
- there must always be at least 3 pillar reference bars no further than 7 meters from the tracker;
- if there are occlusions in the room, additional pillars are needed which will guarantee the visibility of IR markers;
- the center of the pillar tracking area is mandatory indicated by pair of pillars;
- when setting up the tracking area, it is desirable to alternate between the pillar’s heights;
- after the installation of the pillar reference bars is completed, it's necessary to remove the clamps of the IR markers suspension;
- it is not recommended to place reference bars closer than 0.5 meters from each other if the visibility zones of their markers intersect.
Connecting power supplies
Each pillar is connected to a charger or a power bank as a power source.
Note! It is necessary to use high-quality wires with a length of up to 2 m. For lengths > 2 m, Power Delivery 100W Type-C (m) — USB Type-C (m) cable is used.
Pillar alignment
The sensor of a reference bar is located on the top of the device. It supports contact and non-contact triggering. For a non-contact method, it is enough to place your palm a few centimeters above the sensor.

For correct operation, it is necessary to ensure a strictly vertical position of the pillar reference bars. Each time it is turned on, a check of a pillar's position is automatically launched. If the deviation of the reference bar from the vertical is within the tolerance, then the indicator at the top of the bar will be green. If the deviation exceeds the allowable values, the indicator color will change to red.
We recommend to align the pillars every time you turn on the tracking area. To do this, activate the sensor on the top. When the alignment starts, the indicator will turn blue. To stop the proccess, activate the bar sensor again.
The mechanism is based on the alignment of the position of the magnet (at the pillar bottom) relative to the center of the magnetometer (at the pillar base). When deviating from the vertical, the system adjusts the length of the extension rods via electric motors. After a successful alignment, the indicator changes its color to green.
The surface deviation that can be corrected by pillar alignment is 3-5 degrees.
Creating and configuring an Environment in AntilatencyService
To create a new Environment in the AntilatencyService application, press the
+ button in the lower right corner of the window and select the New environment menu item. Then name the Environment and select the Pillars type. It is recommended to use the Antilatency preset to load the branded pillar settings.If necessary, you can reject the manufacturer's suggested values and adjust the pillar parameters yourself:
- choose a pattern with two or three IR markers on the reference bar;
- set pillar length;
- determine the number of pillar types and proportions for each type;
- adjust the viewing angle of markers on pillar reference bars.
We suggest using the
Antilatency standard preset. If you want to create custom reference bars, then before installing the tracking area, make sure to contact our support team to check the Environment scheme and the operability of the planned tracking area.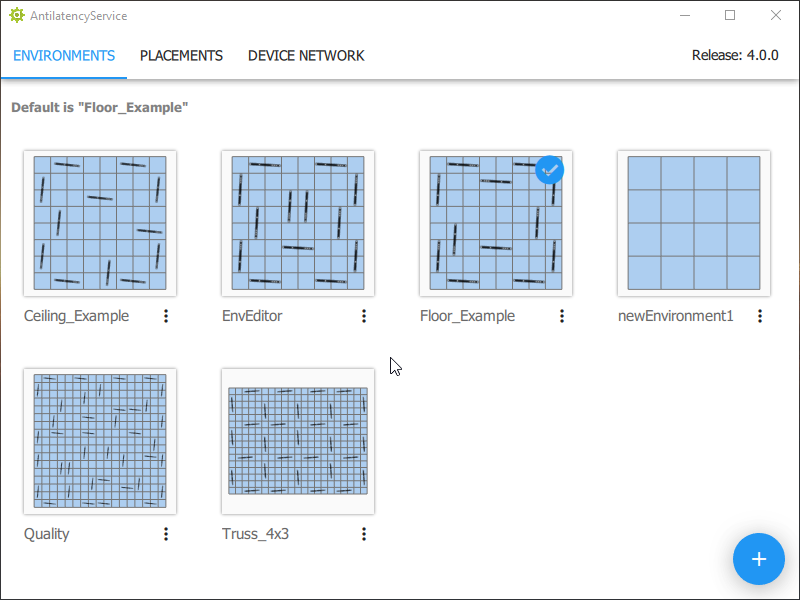
Further information on setting up the Environment and entering the position of reference bars is here: 如何为您跟踪区创建Vertical Environment