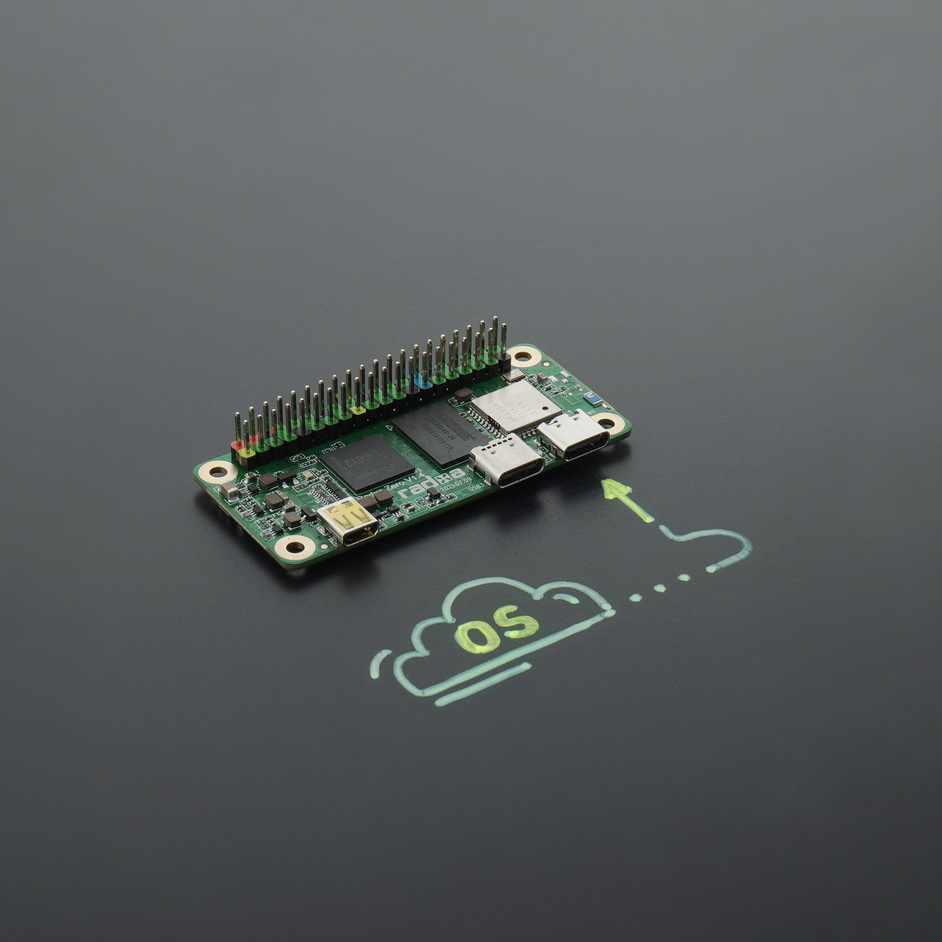
How to install an OS to RADXA Zero eMMC
This is the manual for Windows users who are going to perform this installation using a virtual machine with a Linux system based on Oracle VM VirtualBox.
RADXA Zero will be detected as different devices at different stages of installation. Therefore, we added the configuration of auto-capture of these devices to the basic manual.
Start a virtual machine with the Linux operating system in the Oracle VM VirtualBox application. Then we will perform the installation using this system.
Installing software on a PC
Open the Terminal and run the following commands:
sudo apt install fastbootsudo apt install python3-pipsudo python3 -m pip install pyamlboot
Erasing the eMMC
- Download the fastboot loader:
wget https://dl.radxa.com/zero/images/loader/rz-fastboot-loader.bin - Launch the board in USB boot mode:
- Press and hold the USB BOOT button.
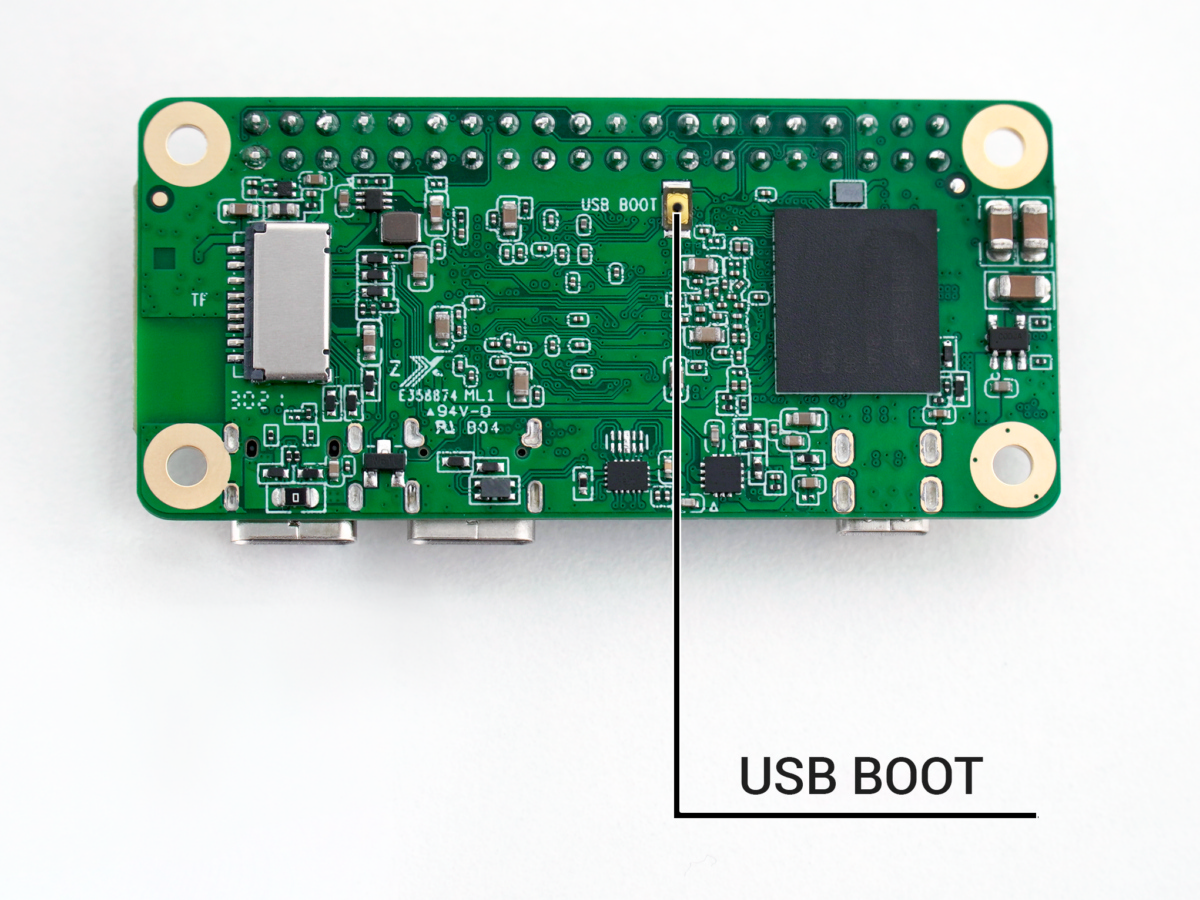
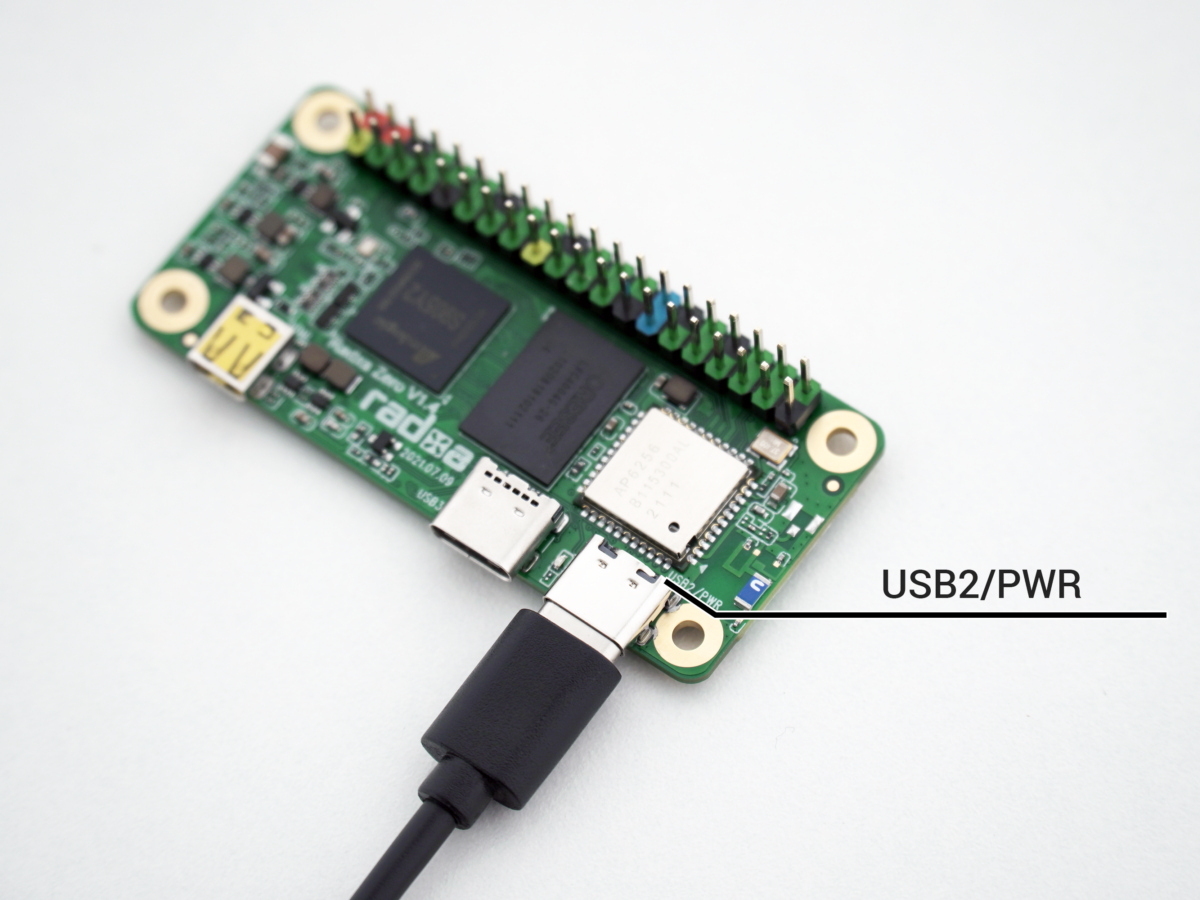
- Then connect the board to a PC via the USB2/PWR connector. It will be used both for powering the board and for data transfer.
- Release the USB BOOT button.
Configure auto-capture of this USB device using the Oracle VM VirtualBox virtual machine paremeters:- choose Devices tab - USB - USB Settings...;
- click Add new USB filter icon;
- click Amlogic GX-CHIP device.
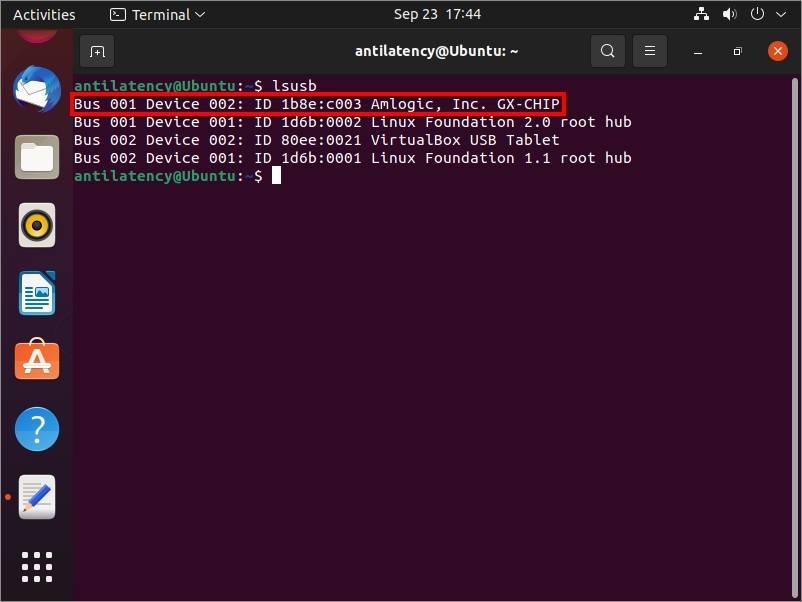
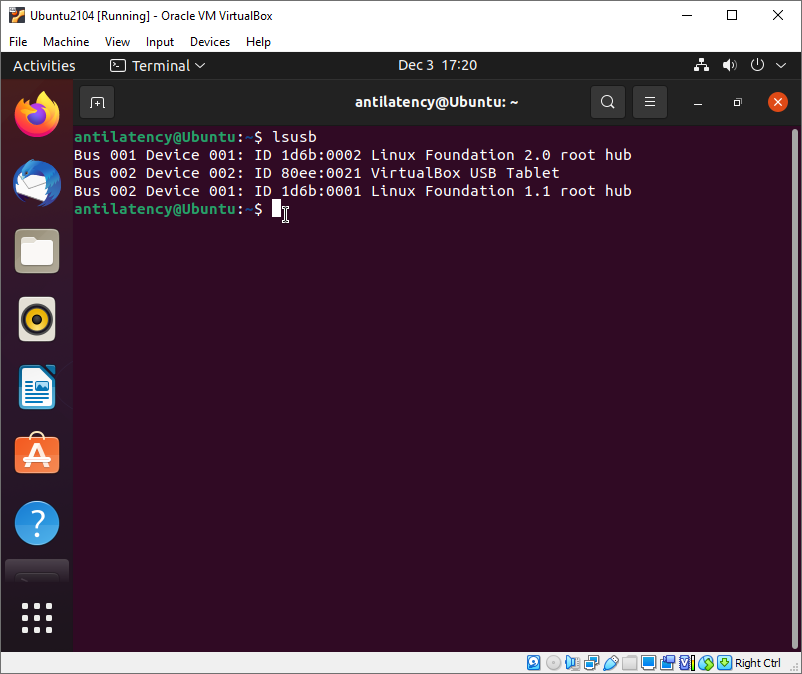
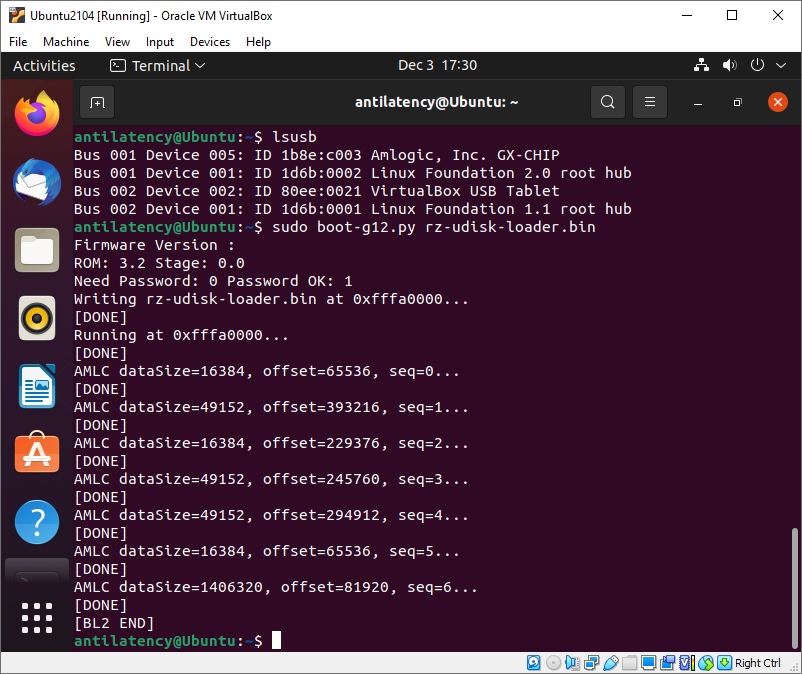
To check whether your OS has detected the connected RADXA board, execute thelsusbcommand in the Terminal. The list of USB devices should contain a device likeBus 001 Device 002: ID 1b8e:c003 Amlogic, Inc. GX-CHIP.
 If auto-capture fails, and the device does not appear in the list of connected USB devices, then try connecting the board in USB boot mode to another USB port (socket) on your PC's motherboard, and then repeat the
lsusbcommand.
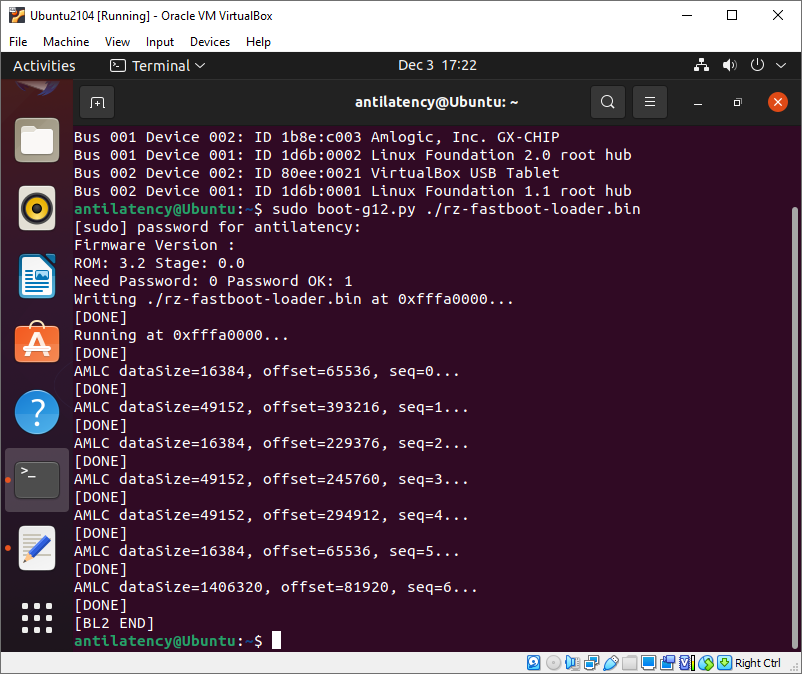
- Run fastboot loader on RADXA Zero:
sudo boot-g12.py ./rz-fastboot-loader.bin
At this stage, the name of the RADXA Zero device has changed.
Configure auto-capture of the new USB device using the Oracle VM VirtualBox virtual machine paremeters:- choose Devices tab - USB - USB Settings...;
- click Add new USB filter icon;
- click Radxa USB download gadget device.
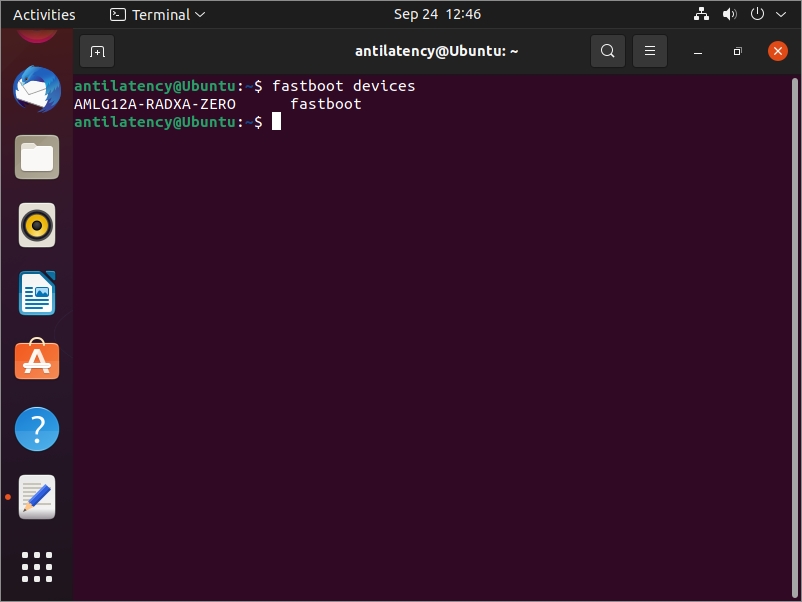
- Run the command:
fastboot devices
The connected device in fastboot mode should be displayed in the terminal:AMLG12A-RADXA-ZERO fastboot
- Erase the eMMC:
sudo fastboot erase bootloadersudo fastboot erase bootenvsudo fastboot erase 0
Installing the operating system in the erased eMMC
- Download the operating system:
wget https://dl.radxa.com/zero/images/armbian/Armbian_21.08.0-trunk_Radxa-zero_focal_current_5.10.58_xfce_desktop.img.xz - Unpack the operating system image:
unxz Armbian_21.08.0-trunk_Radxa-zero_focal_current_5.10.58_xfce_desktop.img.xz - Download eMMC udisk loader
wget https://dl.radxa.com/zero/images/loader/rz-udisk-loader.bin - Execute
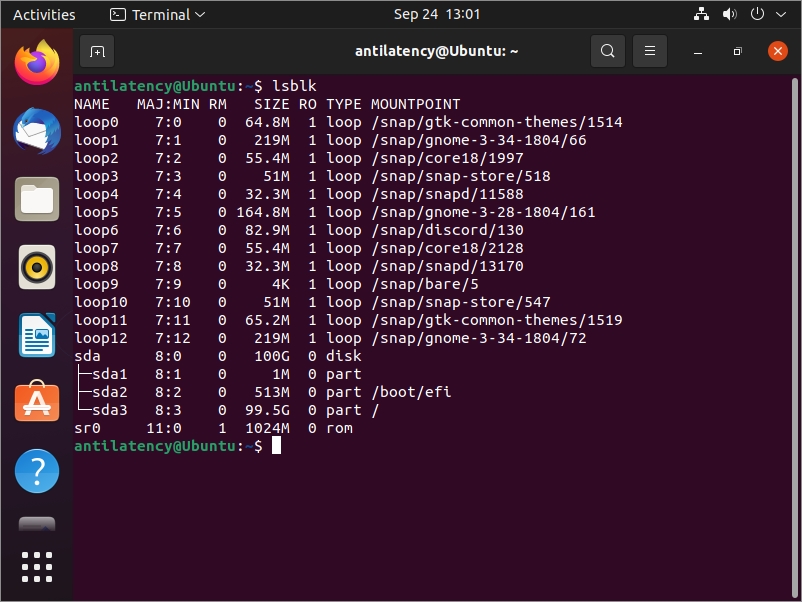
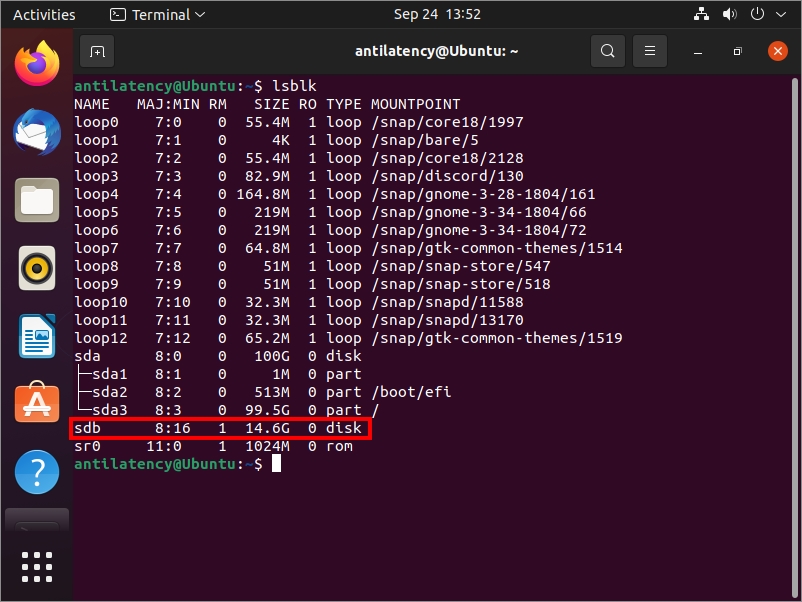
lsblkorls /dev/sd*command to display what disks the system contains. Remember the disk names like sdX, where X is any letter.
- Configure eMMC as a block storage device:
- Disconnect RADXA zero from the PC.
- Press and hold the USB BOOT button.
- Then connect the board to a PC via the USB2/PWR connector. It will be used both for powering the board and for data transfer.
- Release the USB BOOT button.
- Execute the
lsusbcommand in the Terminal. The list of USB devices should contain a device likeBus 001 Device 002: ID 1b8e:c003 Amlogic, Inc. GX-CHIP
- Load the udisk-loader in RADXA Zero to switch the device to disk mode:
sudo boot-g12.py rz-udisk-loader.bin
After executing this command, the external OS (MS Windows) may offer to format the new disk (i.e. RADXA Zero in disk mode). Click the "Cancel" button or close the format window.The device name is the same as the previous one, but its Product ID and Vendor ID have changed.
Configure auto-capture of the updated USB device using the Oracle VM VirtualBox virtual machine paremeters:- choose Devices tab - USB - USB Settings...;
- click Add new USB filter icon;
- click Radxa USB download gadget device.
- Сheck whether the new disk has appeared in the system:
lsblkorls /dev/sd*.
For example: there was one sda disk only in the system. After switching the device to disk mode, the sdb disk should have appeared.
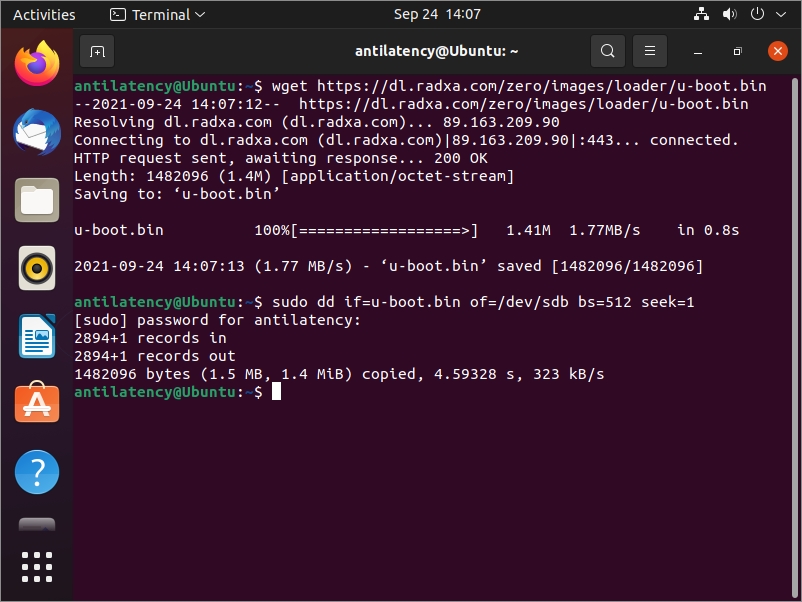
- Write the operating system image to eMMC:
sudo dd if=Armbian_21.08.0-trunk_Radxa-zero_focal_current_5.10.58_xfce_desktop.img of=/dev/sdb bs=1M status=progress, where command part /dev/sdb is the appeared disk (RADXA Zero). - Write the loader to eMMC:
wget https://dl.radxa.com/zero/images/loader/u-boot.binsudo dd if=u-boot.bin of=/dev/sdb bs=512 seek=1, where command part /dev/sdb is the appeared disk (RADXA Zero).
The installation of the operating system to RADXA Zero is completed! Now you can disconnect it from your PC. Then connect a monitor, a keyboard, and a power unit to the board. Wait for the system to boot and start working.