RadioScanner
This is a utility to assess radio congestion on the 2.4GHz frequency band. The Antilatency Radio Protocol operates on this frequency.
A lot of devices using the 2.4-2.5GHz band will create network interference for the Antilatency Radio Protocol. The main source of radio noise is 2.4GHz wireless internet due to its widespread use and relatively high signal strength. The more data that is exchanged between wireless devices, the higher the radio noise levels will be.
The RadioScanner utility will help you build a picture of real-time noise levels on all radio channels. Unfortunately, a channel that has minimal losses during the test may deteriorate later on. For example, it may happen because the devices that usually occupy this band were off but have come back online. To minimize this risk, you ought to include more data in your analysis. The more scans you run (preferably at different times and in different locations), the better picture of your radio environment you will get.
The RadioScanner changes channels and saves the number of errors in radio packet transmission per run. One scan will take approximately 12 minutes.
See our video tutorial on working with the utility.
Preparing to launch
- Download and install Microsoft Visual C++ Redistributable for Visual Studio 2015, 2017 and 2019 for the utilities to run correctly.
Make sure that your wireless device is fully charged.
Test launch
Place your devices 1-2 meters apart. Make sure that there are no interfering objects between them, especially those that can carry static electricity (this includes people standing nearby). If possible, exclude all external factors that can influence device operation because it creates variable conditions for the test depending on the channel.
Before starting the test, make sure all the Antilatency devices are turned off.
Turn on Universal Radio Socket and limit the number of connected devices using the ConnLimit property:
ConnLimit = 1.Please, read here to learn how to configure custom properties: How to configure Antilatency wireless devices
Close AntilatencyService before starting the radio scan. To learn more: Task.
Open the console and access the folder with
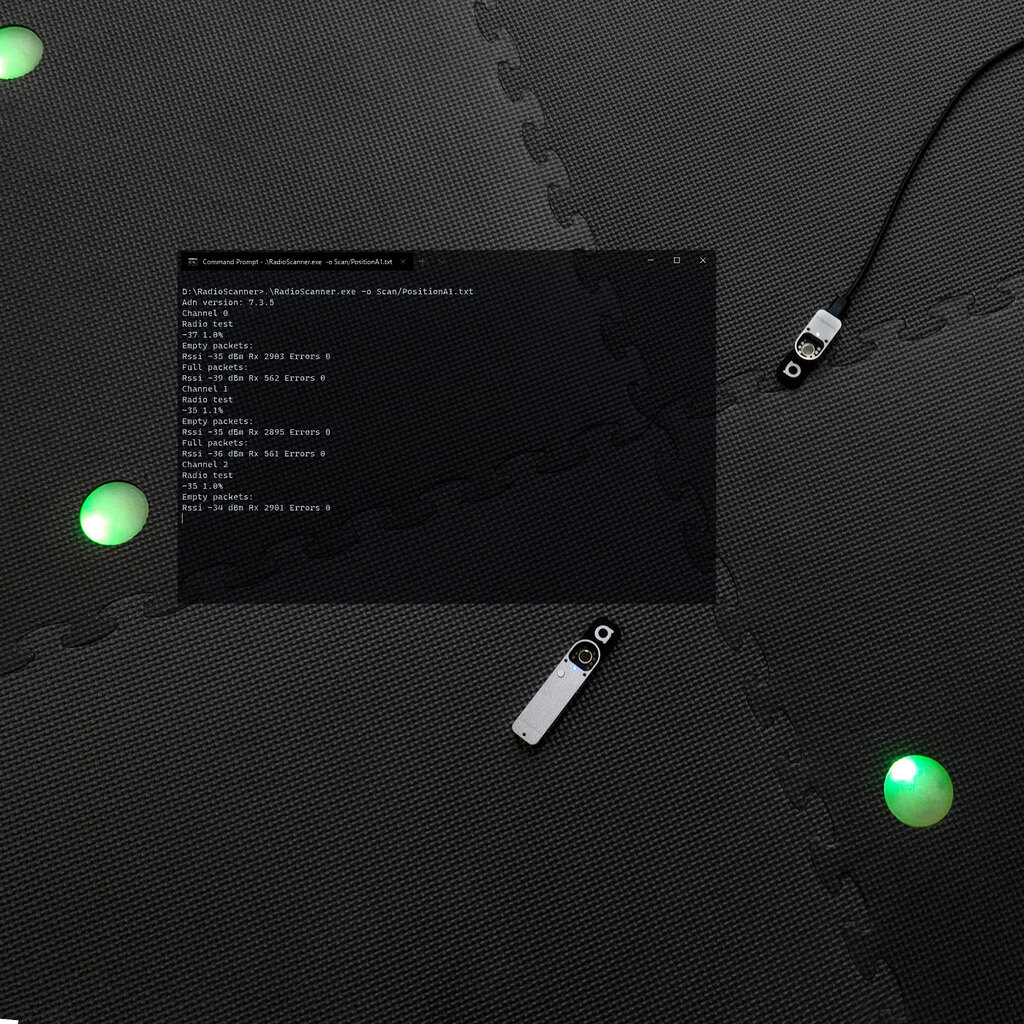
RadioScanner.exe. Create a folder to store scan results.Run the RadioScanner and set the path to save test data:
.\RadioScanner.exe -o Scan/PositionA1.txtScan— the name of the folder storing the results;PositionA1.txt— the name of the file with the test results. We recommend including the test location and number in the name of the file.
Run one or two more scans in this location. Then, change the test location and repeat the test.
Analysis
Please note, all the data used below is given as an example. Your results may be different.
To analyze the results, group it in a summary table:
.\RadioScanner.exe report -i Scan -o scan.txtThis command creates a file named
scan.txt. A convenient way to analyze these results is using Google Sheets or similar spreadsheet software.Copy the entire content of your
scan.txt file and insert it into the page. Enter channel numbers from 0 to 140 and make the column narrow for better viewing. Optionally, you can add conditional formatting for more visual clarity.The results of two scans may look as follows:

- the upper line — the channel's number;
- the second line — results of the first test at point A;
- the last line — results of the second test at point A.
The number in the cell shows how many packets - out of roughly 10,000 packets - were lost. Empty cells are channels with missing stats, possibly due to an unstable connection.
- channels
0-40and122-140will be almost loss-free because wireless networks do not use them.
Before using them you should check whether it is legal in your country.
For this example:
- channels
108-121are the best choices for connections; - channels
89-106appear to be unstable with a lot of packet loss.
It's recommended to set at least 6 channels distance between the selected frequencies. Please refer to: Antilatency Radio Protocol.