Environment editor
An instrument that allows editing the Environment, configuring the parameters of the tracking area, creating routing and optimizing the tracking quality.
Table of contents
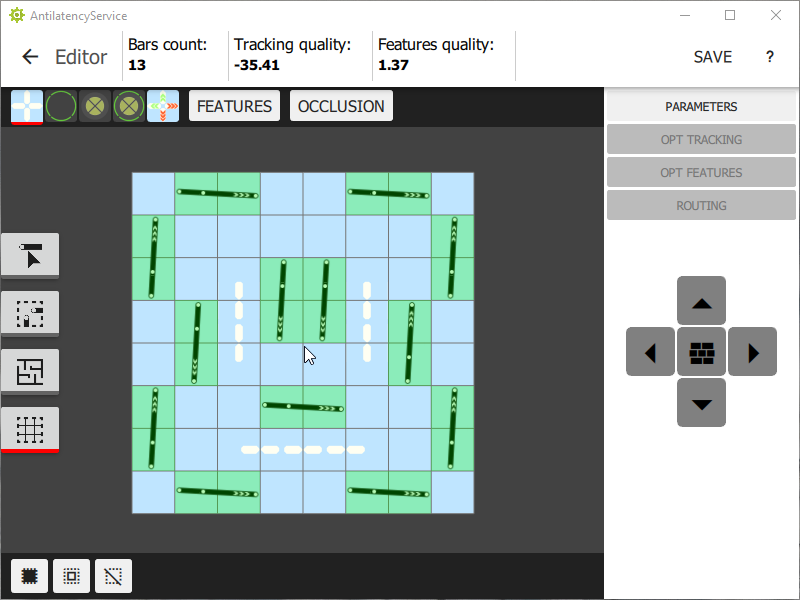
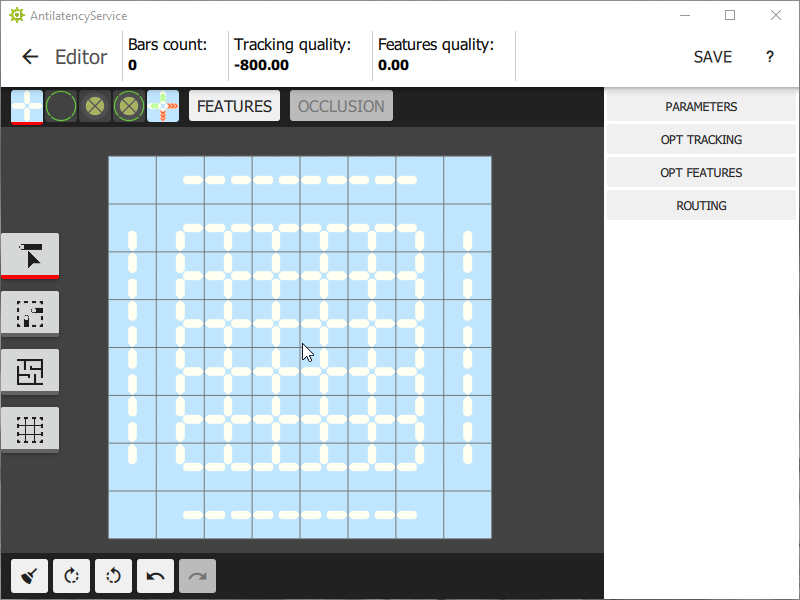
Editor interface
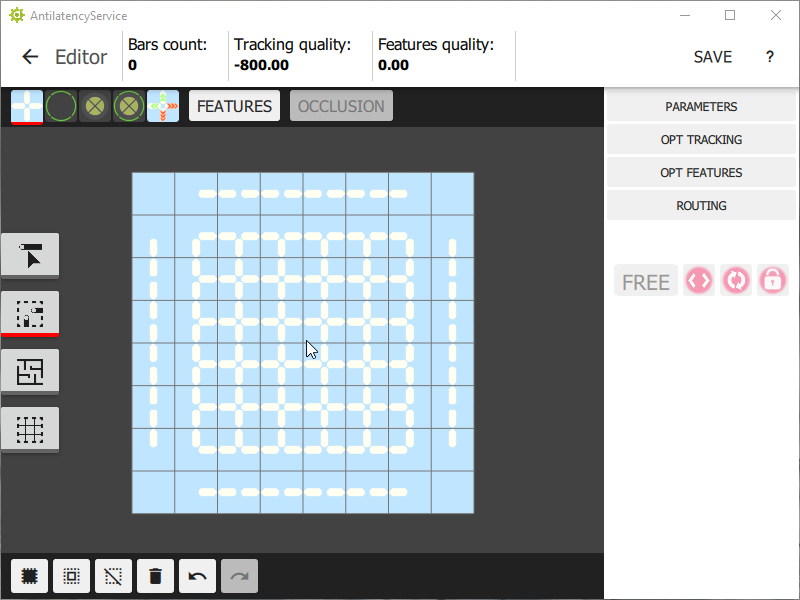
The number of reference bars with IR markers and the area quality metrics (
tracking quality and features quality) are displayed at the top.The metrics are given in conventional logarithmic units. In particular, negative values of tracking quality are a normal display of the internal logarithmic scale, they don't mean "bad tracking". Users have to place the reference bars in such a way as to achieve the maximum possible value of both metrics.

The instruments available for chosen editor mode are displayed at the bottom. Additional editor modules are located on the right side:
Parameters, Opt Tracking, etc.Editor modules
Parameters
Opens "Environment scheme" window, and allows editing the parameters of the tracking area: its name, size and geometrical attributes. You can load the preset of the tracking area: floor, ceiling or truss.
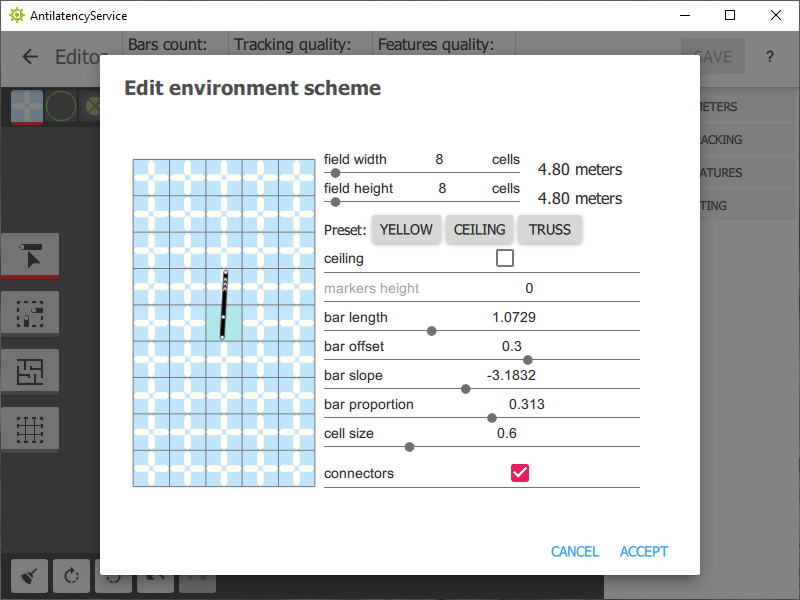
Environment Parameters:
field width— the width of the area in cells;field height— the length of the area in cells;ceiling— the plane in which the markers are located;
Select if the markers are on the ceiling.markers height— the height of the markers mounting;bar length— the length of each bar;bar offset— the displacement of the bar;bar slope— the rotation of the bar;bar proportionallows changing the bar's proportion;cell sizesets the size of each cell.
Warning! We suggest using the standard presets. When you create a custom Environment, you take responsibility for the operation of the tracking area. Make sure to contact our support team to check the custom Environment before installing the tracking area.
Simulation
This instrument allows editing the virtual tracker's parameters. The default values correspond to the most common scenario: the Alt is set up at human height with a slight downward angle. The values set here are used when calculating the quality of the area and affect the operation of the tracking generators. To change the parameters of the virtual tracker you need to switch to
Manage the Occlusion mode.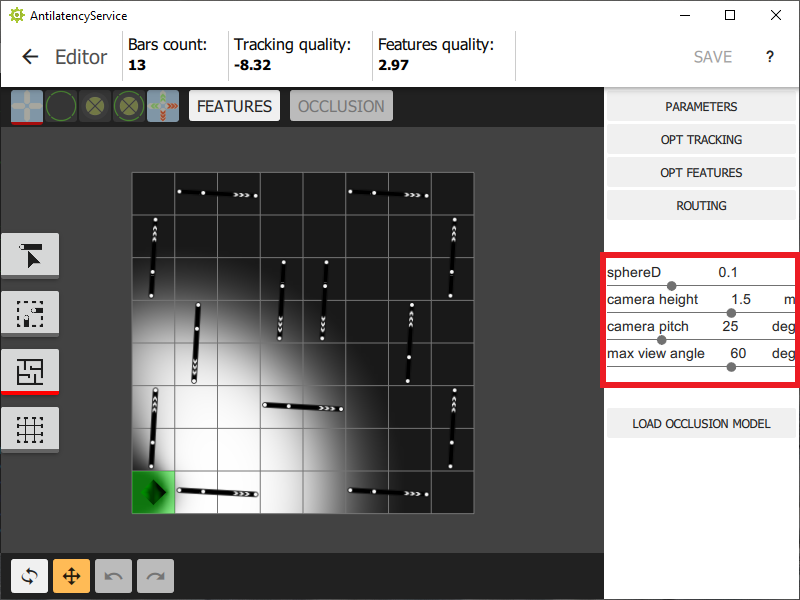
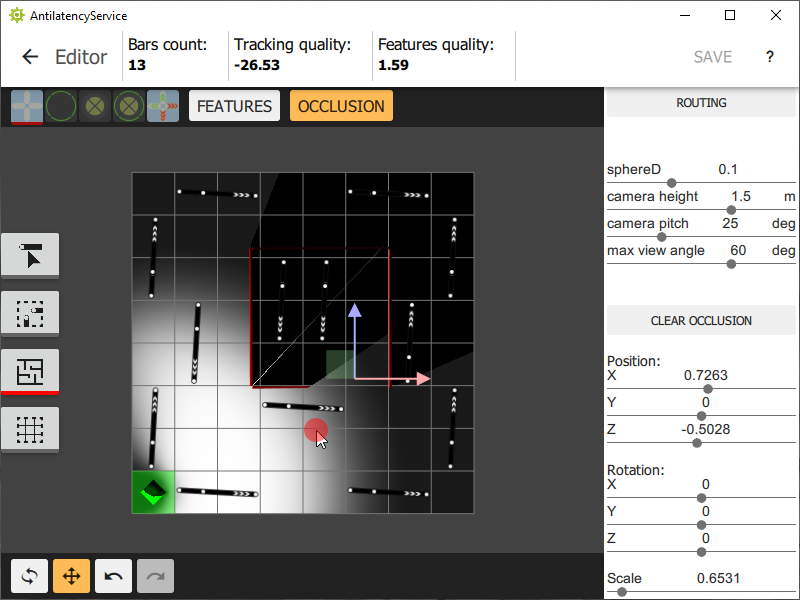
sphereD— the view angle;camera height— the height above floor level;camera pitch— the pitch of the camera;max view angle— the maximum angle to the normal at which markers are visible.
Opt tracking
The optimizer of the tracking that allows automatically distributing the required number of reference bars across the Environment.
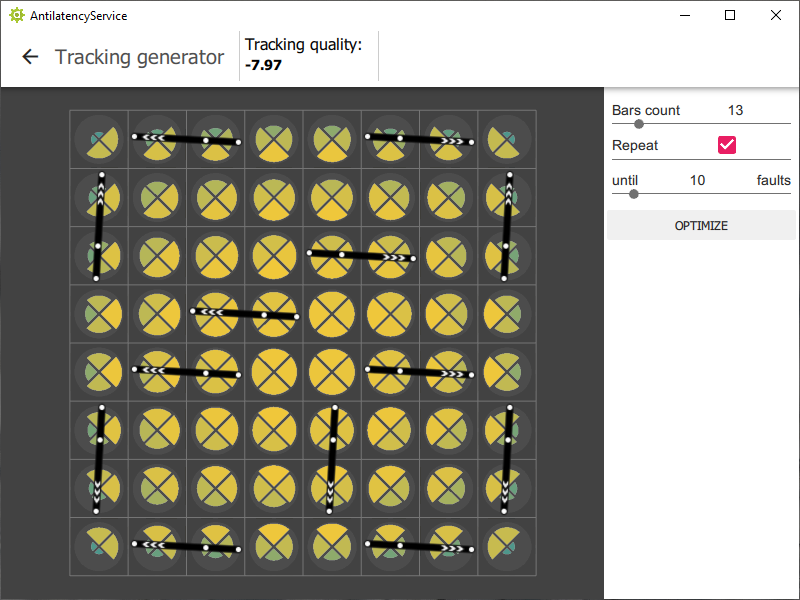
bars count— the number of reference bars you need to distribute across the area;repeatdetermines whether the optimization will run once or until N-number of faults have occured;until N faultsdetermines the number of faults that have to occur for the generator to stop.
Opt features
The optimizer of the feature quality. The default parameters provide the best optimization quality.

show trackingturns on the tracking quality display mode;show features— turns on the feature display mode;tracking quality— sets the minimal allowable tracking quality; we recommend setting this to not less than 99% if possible;population size, survival rate, mutability— hyperparameters of the evolutionary algorithm.
Routing
This is an editor for the routing scheme. Here you can set the number of power sources and generate the routing scheme automatically or manually.

Please, read here to learn more about creating of the routing scheme: How to create an Environment routing scheme for the floor tracking area
Edit modes
You can choose edit mode on the left panel:
Edit bars
Use this mode to manually add or delete reference bars. To add a bar, hold the left mouse button and draw a line. To delete a reference bar, double click on it.
Select multiple bars
Use this mode to select multiple reference bars while holding the left mouse button. Here you can set the lock state for the selected reference bars to determine the way they will be processed in the
OptTracking mode.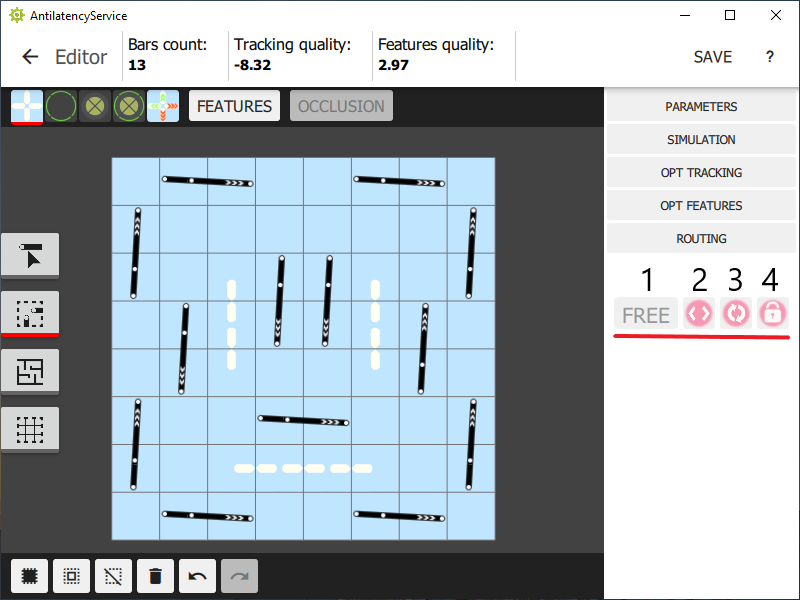
1— rotate or move this bar in any direction;2— move this bar along the arrows only and turn it 180 degrees;3— rotate this bar but do not move it;4— no transformation allowed for this bar.
Manage the occlusion environment
Use the
Load occlusion model option to load a 3D model of a room, for example. You can move and rotate this model. To delete it, click Clear occlusion.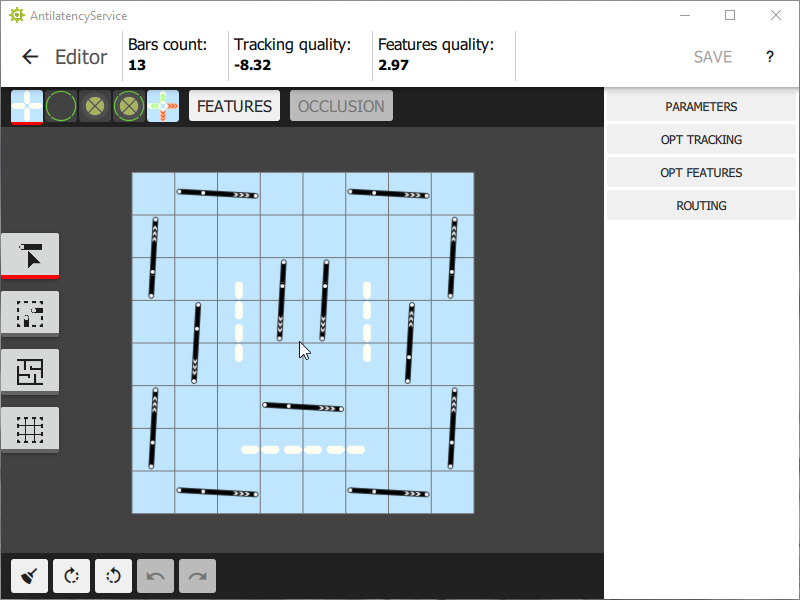
Hold the right mouse button to rotate the tracking area with the model.
Learn more about deployment of occlusions on a HorizontalGrid Environment in this section.
Select multiple cells
Use this mode to determine the areas and directions where reference bars can't be placed. The conditions you set will work both if you place the bars manually or if you use the OptTracker generator.
For more information about the options for locking cells in a HorizontalGrid Environment, see the section.
Display modes
1— default display mode; white arrows display the directions in which you can place reference bars;2— feature quality display mode; the deeper the color of the arc, the more features are visible in this direction;3— tracking quality display mode;4— combined mode; it displays quality of feature density and tracking;5— estimation mode; green and red arrows display the expected quality changes in the visibility of features when adding a new reference bar in this area. These changes update in the 3x3 cells area around the last deleted bar.

Use the
Features option to analyze the quality of the features density for the tracking area.
If you load a 3D occlusion model, use the
Occlusion button to show or hide the model.